Category Archives: Maemo

QEMU and the qcow2 metadata checks

When choosing a disk image format for your virtual machine one of the factors to take into considerations is its I/O performance. In this post I’ll talk a bit about the internals of qcow2 and about one of the aspects that can affect its performance under QEMU: its consistency checks.

As you probably know, qcow2 is QEMU’s native file format. The first thing that I’d like to highlight is that this format is perfectly fine in most cases and its I/O performance is comparable to that of a raw file. When it isn’t, chances are that this is due to an insufficiently large L2 cache. In one of my previous blog posts I wrote about the qcow2 L2 cache and how to tune it, so if your virtual disk is too slow, you should go there first.

I also recommend Max Reitz and Kevin Wolf’s qcow2: why (not)? talk from KVM Forum 2015, where they talk about a lot of internal details and show some performance tests.

qcow2 clusters: data and metadata

A qcow2 file is organized into units of constant size called clusters. The cluster size defaults to 64KB, but a different value can be set when creating a new image:

qemu-img create -f qcow2 -o cluster_size=128K hd.qcow2 4G

Clusters can contain either data or metadata. A qcow2 file grows dynamically and only allocates space when it is actually needed, so apart from the header there’s no fixed location for any of the data and metadata clusters: they can appear mixed anywhere in the file.

Here’s an example of what it looks like internally:

In this example we can see the most important types of clusters that a qcow2 file can have:

  • Header: this one contains basic information such as the virtual size of the image, the version number, and pointers to where the rest of the metadata is located, among other things.
  • Data clusters: the data that the virtual machine sees.
  • L1 and L2 tables: a two-level structure that maps the virtual disk that the guest can see to the actual location of the data clusters in the qcow2 file.
  • Refcount table and blocks: a two-level structure with a reference count for each data cluster. Internal snapshots use this: a cluster with a reference count >= 2 means that it’s used by other snapshots, and therefore any modifications require a copy-on-write operation.

Metadata overlap checks

In order to detect corruption when writing to qcow2 images QEMU (since v1.7) performs several sanity checks. They verify that QEMU does not try to overwrite sections of the file that are already being used for metadata. If this happens, the image is marked as corrupted and further access is prevented.

Although in most cases these checks are innocuous, under certain scenarios they can have a negative impact on disk write performance. This depends a lot on the case, and I want to insist that in most scenarios it doesn’t have any effect. When it does, the general rule is that you’ll have more chances of noticing it if the storage backend is very fast or if the qcow2 image is very large.

In these cases, and if I/O performance is critical for you, you might want to consider tweaking the images a bit or disabling some of these checks, so let’s take a look at them. There are currently eight different checks. They’re named after the metadata sections that they check, and can be divided into the following categories:

  1. Checks that run in constant time. These are equally fast for all kinds of images and I don’t think they’re worth disabling.
    • main-header
    • active-l1
    • refcount-table
    • snapshot-table
  2. Checks that run in variable time but don’t need to read anything from disk.
    • refcount-block
    • active-l2
    • inactive-l1
  3. Checks that need to read data from disk. There is just one check here and it’s only needed if there are internal snapshots.
    • inactive-l2

By default all tests are enabled except for the last one (inactive-l2), because it needs to read data from disk.

Disabling the overlap checks

Tests can be disabled or enabled from the command line using the following syntax:

-drive file=hd.qcow2,overlap-check.inactive-l2=on
-drive file=hd.qcow2,overlap-check.snapshot-table=off

It’s also possible to select the group of checks that you want to enable using the following syntax:

-drive file=hd.qcow2,overlap-check.template=none
-drive file=hd.qcow2,overlap-check.template=constant
-drive file=hd.qcow2,overlap-check.template=cached
-drive file=hd.qcow2,overlap-check.template=all

Here, none means that no tests are enabled, constant enables all tests from group 1, cached enables all tests from groups 1 and 2, and all enables all of them.

As I explained in the previous section, if you’re worried about I/O performance then the checks that are probably worth evaluating are refcount-block, active-l2 and inactive-l1. I’m not counting inactive-l2 because it’s off by default. Let’s look at the other three:

  • inactive-l1: This is a variable length check because it depends on the number of internal snapshots in the qcow2 image. However its performance impact is likely to be negligible in all cases so I don’t think it’s worth bothering with.
  • active-l2: This check depends on the virtual size of the image, and on the percentage that has already been allocated. This check might have some impact if the image is very large (several hundred GBs or more). In that case one way to deal with it is to create an image with a larger cluster size. This also has the nice side effect of reducing the amount of memory needed for the L2 cache.
  • refcount-block: This check depends on the actual size of the qcow2 file and it’s independent from its virtual size. This check is relatively expensive even for small images, so if you notice performance problems chances are that they are due to this one. The good news is that we have been working on optimizing it, so if it’s slowing down your VMs the problem might go away completely in QEMU 2.9.

Conclusion

The qcow2 consistency checks are useful to detect data corruption, but they can affect write performance.

If you’re unsure and you want to check it quickly, open an image with overlap-check.template=none and see for yourself, but remember again that this will only affect write operations. To obtain more reliable results you should also open the image with cache=none in order to perform direct I/O and bypass the page cache. I’ve seen performance increases of 50% and more, but whether you’ll see them depends a lot on your setup. In many cases you won’t notice any difference.

I hope this post was useful to learn a bit more about the qcow2 format. There are other things that can help QEMU perform better, and I’ll probably come back to them in future posts, so stay tuned!

Acknowledgments

My work in QEMU is sponsored by Outscale and has been made possible by Igalia and the help of the rest of the QEMU development team.

I/O bursts with QEMU 2.6

QEMU 2.6 was released a few days ago. One new feature that I have been working on is the new way to configure I/O limits in disk drives to allow bursts and increase the responsiveness of the virtual machine. In this post I’ll try to explain how it works.

The basic settings

First I will summarize the basic settings that were already available in earlier versions of QEMU.

Two aspects of the disk I/O can be limited: the number of bytes per second and the number of operations per second (IOPS). For each one of them the user can set a global limit or separate limits for read and write operations. This gives us a total of six different parameters.

I/O limits can be set using the throttling.* parameters of -drive, or using the QMP block_set_io_throttle command. These are the names of the parameters for both cases:

-drive block_set_io_throttle
throttling.iops-total iops
throttling.iops-read iops_rd
throttling.iops-write iops_wr
throttling.bps-total bps
throttling.bps-read bps_rd
throttling.bps-write bps_wr

It is possible to set limits for both IOPS and bps at the same time, and for each case we can decide whether to have separate read and write limits or not, but if iops-total is set then neither iops-read nor iops-write can be set. The same applies to bps-total and bps-read/write.

The default value of these parameters is 0, and it means unlimited.

In its most basic usage, the user can add a drive to QEMU with a limit of, say, 100 IOPS with the following -drive line:

-drive file=hd0.qcow2,throttling.iops-total=100

We can do the same using QMP. In this case all these parameters are mandatory, so we must set to 0 the ones that we don’t want to limit:

   { "execute": "block_set_io_throttle",
     "arguments": {
        "device": "virtio0",
        "iops": 100,
        "iops_rd": 0,
        "iops_wr": 0,
        "bps": 0,
        "bps_rd": 0,
        "bps_wr": 0
     }
   }

I/O bursts

While the settings that we have just seen are enough to prevent the virtual machine from performing too much I/O, it can be useful to allow the user to exceed those limits occasionally. This way we can have a more responsive VM that is able to cope better with peaks of activity while keeping the average limits lower the rest of the time.

Starting from QEMU 2.6, it is possible to allow the user to do bursts of I/O for a configurable amount of time. A burst is an amount of I/O that can exceed the basic limit, and there are two parameters that control them: their length and the maximum amount of I/O they allow. These two can be configured separately for each one of the six basic parameters described in the previous section, but here we’ll use ‘iops-total’ as an example.

The I/O limit during bursts is set using ‘iops-total-max’, and the maximum length (in seconds) is set with ‘iops-total-max-length’. So if we want to configure a drive with a basic limit of 100 IOPS and allow bursts of 2000 IOPS for 60 seconds, we would do it like this (the line is split for clarity):

   -drive file=hd0.qcow2,
          throttling.iops-total=100,
          throttling.iops-total-max=2000,
          throttling.iops-total-max-length=60

Or with QMP:

   { "execute": "block_set_io_throttle",
     "arguments": {
        "device": "virtio0",
        "iops": 100,
        "iops_rd": 0,
        "iops_wr": 0,
        "bps": 0,
        "bps_rd": 0,
        "bps_wr": 0,
        "iops_max": 2000,
        "iops_max_length": 60,
     }
   }

With this, the user can perform I/O on hd0.qcow2 at a rate of 2000 IOPS for 1 minute before it’s throttled down to 100 IOPS.

The user will be able to do bursts again if there’s a sufficiently long period of time with unused I/O (see below for details).

The default value for ‘iops-total-max’ is 0 and it means that bursts are not allowed. ‘iops-total-max-length’ can only be set if ‘iops-total-max’ is set as well, and its default value is 1 second.

Controlling the size of I/O operations

When applying IOPS limits all I/O operations are treated equally regardless of their size. This means that the user can take advantage of this in order to circumvent the limits and submit one huge I/O request instead of several smaller ones.

QEMU provides a setting called throttling.iops-size to prevent this from happening. This setting specifies the size (in bytes) of an I/O request for accounting purposes. Larger requests will be counted proportionally to this size.

For example, if iops-size is set to 4096 then an 8KB request will be counted as two, and a 6KB request will be counted as one and a half. This only applies to requests larger than iops-size: smaller requests will be always counted as one, no matter their size.

The default value of iops-size is 0 and it means that the size of the requests is never taken into account when applying IOPS limits.

Applying I/O limits to groups of disks

In all the examples so far we have seen how to apply limits to the I/O performed on individual drives, but QEMU allows grouping drives so they all share the same limits.

This feature is available since QEMU 2.4. Please refer to the post I wrote when it was published for more details.

The Leaky Bucket algorithm

I/O limits in QEMU are implemented using the leaky bucket algorithm (specifically the “Leaky bucket as a meter” variant).

This algorithm uses the analogy of a bucket that leaks water constantly. The water that gets into the bucket represents the I/O that has been performed, and no more I/O is allowed once the bucket is full.

To see the way this corresponds to the throttling parameters in QEMU, consider the following values:

  iops-total=100
  iops-total-max=2000
  iops-total-max-length=60
  • Water leaks from the bucket at a rate of 100 IOPS.
  • Water can be added to the bucket at a rate of 2000 IOPS.
  • The size of the bucket is 2000 x 60 = 120000.
  • If iops-total-max is unset then the bucket size is 100.

bucket

The bucket is initially empty, therefore water can be added until it’s full at a rate of 2000 IOPS (the burst rate). Once the bucket is full we can only add as much water as it leaks, therefore the I/O rate is reduced to 100 IOPS. If we add less water than it leaks then the bucket will start to empty, allowing for bursts again.

Note that since water is leaking from the bucket even during bursts, it will take a bit more than 60 seconds at 2000 IOPS to fill it up. After those 60 seconds the bucket will have leaked 60 x 100 = 6000, allowing for 3 more seconds of I/O at 2000 IOPS.

Also, due to the way the algorithm works, longer burst can be done at a lower I/O rate, e.g. 1000 IOPS during 120 seconds.

Acknowledgments

As usual, my work in QEMU is sponsored by Outscale and has been made possible by Igalia and the help of the QEMU development team.

igalia-outscale

Enjoy QEMU 2.6!

QEMU and open hardware: SPEC and FMC TDC

Working with open hardware

Some weeks ago at LinuxCon EU in Barcelona I talked about how to use QEMU to improve the reliability of device drivers.

At Igalia we have been using this for some projects. One of them is the Linux IndustryPack driver. For this project I virtualized two boards: the TEWS TPCI200 PCI carrier and the GE IP-Octal 232 module. This work helped us find some bugs in the device driver and improve its quality.

Now, those two boards are examples of products available in the market. But fortunately we can use the same approach to develop for hardware that doesn’t exist yet, or is still in a prototype phase.

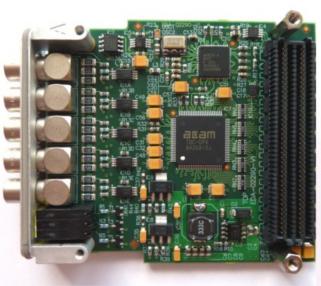
Such is the case of a project we are working on: adding Linux support for this FMC Time-to-digital converter.

FMC TDC

This piece of hardware is designed by CERN and is published under the CERN Open Hardware Licence, which, in their own words “is to hardware what the General Public Licence (GPL) is to software”.

The Open Hardware repository hosts a number of projects that have been published under this license.

Why we use QEMU

So we are developing the device driver for this hardware, as my colleague Samuel explains in his blog. I’m the responsible of virtualizing it using QEMU. There are two main reasons why we want to do this:

  1. Limited availability of the hardware: although the specification is pretty much ready, this is still a prototype. The board is not (yet) commercially available. With virtual hardware, the whole development team can have as many “boards” as it needs.
  2. Testing: we can test the software against the virtual driver, force all kinds of conditions and scenarios, including the ones that would probably require us to physically damage the board.

While the first point might be the most obvious one, testing the software is actually the one we’re more interested in.

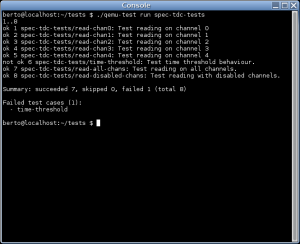
My colleague Miguel wrote a detailed blog post on how we have been using QEMU to do testing.

Writing the virtual hardware

Writing a virtual version of a particular piece of hardware for this purpose is not as hard as it might look.

First, the point is not to reproduce accurately how the hardware works, but rather how it behaves from the operating system point of view: the hardware is a black box that the OS talks to.

Second, it’s not necessary to have a complete emulation of the hardware, there’s no need to support every single feature, particularly if your software is not going to use it. The emulation can start with the basic functionality and then grow as needed.

The FMC TDC, for example, is an FMC card which is in our case connected to a PCIe bridge called SPEC (also available in the Open Hardware repository).

We need to emulate both cards in order to have a working system, but the emulation is, at the moment, treating both as if they were just one, which makes it a bit easier to have a prototype and from the device driver point of view doesn’t really make a difference. Later the emulation can be split in two as I did with with TPCI200 and IP-Octal 232. This would allow us to support more FMC hardware without having to rewrite the bridging code.

There’s also code in the emulation to force different kind of scenarios that we are using to test if the driver behaves as expected and handles errors correctly. Those tests include the simulation of input in the any of the lines, simulation of noise, DMA errors, etc.

Tests

And we have written a set of test cases and a continuous integration system, so the driver is automatically tested every time the code is updated. If you want details on this I recommend you again to read Miguel’s post.

Igalia at LinuxCon Europe

I came to Barcelona with a few other Igalians this week for LinuxCon, the Embedded
Linux Conference
and the KVM Forum.

We are sponsoring the event and we have a couple of presentations this year, one about QEMU, device drivers and industrial hardware (which I gave today, slides here) and the other about the Grilo multimedia framework (by Juan Suárez).

We’ll be around the whole week so you can come and talk to us anytime. You can find us at our booth on the ground floor, where you’ll also be able to see a few demos of our latest work and get some merchandising.

Igalia booth

IndustryPack, QEMU and LinuxCon

IndustryPack drivers for Linux

In the past months we have been working at Igalia to give Linux support to IndustryPack devices.

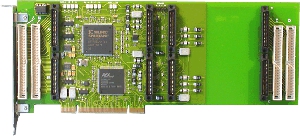
IndustryPack modules are small boards (“mezzanine”) that are attached to a carrier board, which serves as a bridge between them and the host bus (PCI, VME, …). We wrote the drivers for the TEWS TPCI200 PCI carrier and the GE IP-OCTAL-232 module.

TEWS TPCI200
GE IP-OCTAL-232

My mate Samuel was the lead developer of the kernel drivers. He published some details about this work in his blog some time ago.

The drivers are available in latest Linux release (3.6 as of this writing) but if you want the bleeding-edge version you can get it from here (make sure to use the staging-next branch).

IndustryPack emulation for QEMU

Along with Samuel’s work on the kernel driver, I have been working to add emulation of the aformentioned IndustryPack devices to QEMU.

The work consists on three parts:

  • TPCI200, the bridge between PCI and IndustryPack.
  • The IndustryPack bus.
  • IPOCTAL-232, an IndustryPack module with eight RS-232 serial ports.

I decided to split the emulation like this to be as close as possible to how the hardware works and to make it easier to reuse the code to implement other IndustryPack devices.

The emulation is functional and can be used with the existing Linux driver. Just make sure to enable CONFIG_IPACK_BUS, CONFIG_BOARD_TPCI200 and CONFIG_SERIAL_IPOCTAL in the kernel configuration.

I submitted the code to QEMU, but it hasn’t been integrated yet, so if you want to test it you’ll need to patch it yourself: get the QEMU source code and apply the TPCI200 patch and the IP-Octal 232 patch. Those patches have been tested with QEMU 1.2.0.

And here’s how you run QEMU with support for these devices:

$ qemu -device tpci200 -device ipoctal

The IP-Octal board implements eight RS-232 serial ports. Each one of those can be redirected to a character device in the host using the functionality provided by QEMU. The ‘serial0‘ to ‘serial7‘ parameters can be used to specify each one of the redirections.

Example:

$ qemu -device tpci200 -device ipoctal,serial0=pty

With this, the first serial port of the IP-Octal board (‘/dev/ipoctal.0.0.0‘ on the guest) will be redirected to a newly-allocated pty on the host.

LinuxCon Europe

Having virtual hardware allows us to test and debug the Linux driver more easily.

In November I’ll be in Barcelona with the rest of the Igalia OS team for LinuxCon Europe and the KVM Forum. I will be talking about how to use QEMU to improve the robustness of device drivers and speed up their development..

Some other Igalians will also be there, including Juan Suárez who will be talking about the Grilo multimedia framework.

See you in Barcelona!

GUADEC 2012

Third day of GUADEC already. And in Coruña!

Coruña

This is a very special city for me.

I came here in 1996 to study Computer Science. Here I discovered UNIX for the first time, and spent hours learning how to use it. It’s funny to see now those old UNIX servers being displayed in a small museum in the auditorium where the main track takes place.

It was also here where I learnt about free software, installed my first Debian system, helped creating the local LUG and met the awesome people that founded Igalia with me. Then we went international, but our headquarters and many of our people are still here so I guess we can still call this home.

So, needless to say, we are very happy to have GUADEC here this time.

I hope you all are enjoying the conference as much as we are. I’m quite satisfied with how it’s been going so far, the local team has done a good job organising everything and taking care of lots of details to make the life of all attendees easier. I especially want to stress all the effort put into the network infrastructure, one of the best that I remember in a GUADEC conference.

At Igalia we’ve been very busy lately. We’re putting lots of effort in making WebKit better, but our work is not limited to that. Our talks this year show some of the things we’ve been doing:

We are also coordinating 4 BOFs (a11y, GNOME OS, WebKit and Grilo) and hosted a UX hackfest in our offices before the conference.

And we have a booth next to the info desk where you can get some merchandising and see our interactivity demos.

WebKitGTK+

In case you missed the conference this year, all talks are being recorded and the videos are expected to be published really soon (before the end of the conference).

So enjoy the remaining days of GUADEC, and enjoy Coruña!

And of course if you’re staying after the conference and want to know more about the city or about Galicia, don’t hesitate to ask me or anyone from the local team, we’ll be glad to help you.

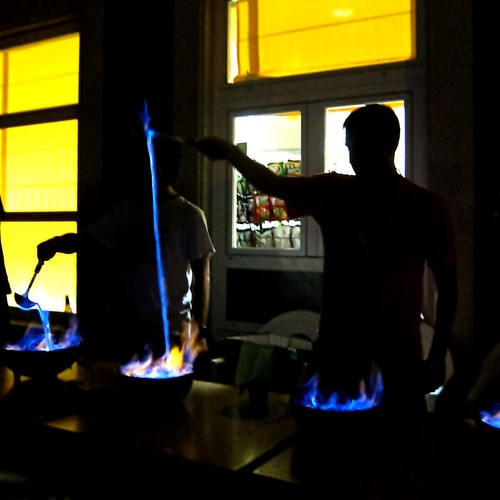
Queimada

FileTea now available in Debian

In the past few weeks I’ve been preparing the Debian packages of FileTea and its companion EventDance. They’re finally available.

FileTea is a free, web-based file sharing system that just works. It only requires a browser, and no user registration is needed. If you want to know more about it, you can read my previous blog post. For a more detailed description, read Nathan Willis’s excellent article on LWN.net. There have been a few changes since that article (HTTPS support in particular) but it’s still the best one you can find on the net.

Igalia still provides a FileTea server at http://filetea.me/, that you can use to share your files and see how it works. We plan to keep offering this service, but you don’t need to trust it/depend on it anymore: now you can apt-get install filetea and have your own.

FileTea: a simple file sharing system

FileTea is a simple way to send files to other people: drag a file into your web browser, give the link to your friends and they can start downloading it right away.

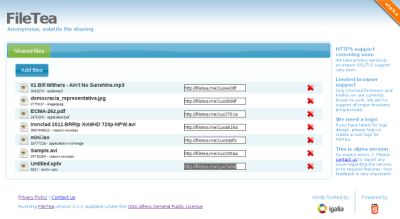
FileTea

This is not a substitute for DropBox and the like. FileTea is not a file hosting service: the web server is only used to route the traffic, no data is stored there.

You can see it as a web-based P2P file sharing system, or a replacement for good ol’ DCC SEND. You don’t need to worry about firewalls or redirections: if you can surf the web, you can send the file. The only client that you need is your browser.

FileTea is a project developed by my fellow Igalian Eduardo Lima, and you can see more details about it here. It was written on top of EventDance, a peer-to-peer inter-process communication library based on GLib and also written by him (see also The Web jumps into D-Bus).

FileTea is free software and you can download it and install it in your machine.

We have also set up a server at http://filetea.me/.

Important: this is still an alpha release and our bandwith is limited so bear with us if you find any problem 🙂

Happy sharing!

Vagalume 0.8.5

Dear Last.fm fellows, I’ve just released Vagalume 0.8.5.

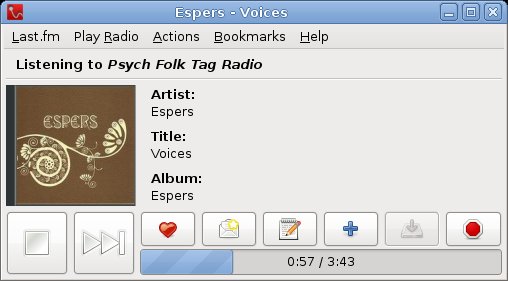
Vagalume 0.8.5

These are the most important changes since the previous version:

  • Improved proxy support.
  • Support for low-bitrate streams, to save bandwidth.
  • GTK+ 3 support.
  • New Catalan translation.

This makes 0.8.5 the first Vagalume to support GTK+ 3, and this without even needing to break backwards compatibility. So now it compiles with any GTK+ version from (at least) 2.6 till 3.0 🙂

Source code, as usual, here. Binaries very soon in your favourite distro.

N9

The Nokia N9 is out.

Yes, after all what happened lately there are many reasons to be sad, cynic or pessimistic, particularly considering all the excitement and hopes that many people (including me) had when the N900 came out.

But still, even if this is a dead-end product and this team’s swan song, it’s a hell of a beautiful one.

Nokia N9

I’m happy to see the N9 out. Philip is damn right, and Urho is damn right. I think this is a great achievement, I’m personally proud of all the work we’ve put into it and also very glad for all the good reviews it’s getting.

Free software can produce amazing things, and this is just one more proof. Our hopes will not die here. No pasarán.