Anyone who has been contributing to the development of drivers for the Linux Kernel is, for sure, familiar with a set of problems that arise during the process:
- The testing environment hangs when testing the changes, and you have to reset again and again before you can find the problem (this is a classical one).
- The hardware is not available: how am I supposed to develop a driver for a hardware I don’t have?.
- There are some configurations in the driver that can’t be tested because they can’t be reproduced at will: the driver is supposed to properly handle error X, but it hasn’t been tested as there’s no way to reproduce it.
- When developing non kernel software, it’s possible to have a continuous integration system together with a battery of tests that will run with each code change, ensuring that the changes done compile and don’t cause regressions. But, this is not easily applicable to kernel development, as the testing system is probably going to hang if there’s an error in the code, which is a pain.
At the OS team at Igalia, we have been thinking of a solution to these problems, and we have developed a system that is able to run test batteries on drivers, checking both valid and error situations, by using QEMU to emulate the hardware device that the driver is meant to handle.
The global idea of the system is:
- Emulate the device you want to work with inside QEMU. Once the specifications of the hardware are available, this is usually easier and faster than getting a real device (which helps with problem 2).
- Once the hardware is emulated, you can easily launch QEMU instances to test your driver changes and new functionalities. If it hangs or crashes, it’s just a QEMU instance, not your whole environment (bye bye problem 1).
- Add some code to the emulated hardware so it can force error situations. This allows you to easily test your driver in uncommon situations at will, which removes problem 3.
- Once at this point, you can perform a really complete test of the driver you’re developing inside QEMU, including error situations, in a controlled and stable environment, so setting a continuous integration and testing system becomes posible (and there goes problem 4!).
So, we decided to follow this structure during the development of the driver for the FMC TDC board we were doing. I was focused on the testing and integration while Alberto was in charge of emulating the hardware and Samuel was dealing with the driver. If you want to know more about these topics you can read their posts about the FMC TDC board emulation and driver development.
We defined this wishlist for the integration and testing system:
- Changes in the driver code must be automatically integrated and tested.
- We want to run a set of tests. The result of one test mustn’t affect the result of other tests (the order of execution is irrelevant)
- Each has a binary that gets executed inside an instance of QEMU and produces a result.
- We need a way for the test to tell to the emulated hardware how to behave. For example, a test that checks the handling of a concrete error must be able to tell the emulated hardware to force that error.
- We want to be able to test several kernel versions with different hardware configurations (memory, processors, etc).
- We need to detect whether the kernel inside QEMU has crashed or got hung, and notify it properly.
- We want to be able to retrieve logs about everything that happens inside the emulation.
With these ideas in mind, we started the development. We decided to build our system around Buildbot, a well known continuous integration and testing tool. It already supports defining building and testing cycles, and reporting the status through a web page, and is also able to monitor software repositories and start new builds when new commits are added, so it was exactly what we needed.
Once we had the Buildbot, we had to define the structure of our tests and how they were going to be launched. We defined a test suite as a directory containing several tests. Each test is a subdirectory containing a known structure of files and directories containing the relevant stuff. The most relevant items in this directory structure are these, despite we already have some new fields prepared for future developments (bold names are folders while the rest are files):
- test-suite
- setup: suite setup executable
- teardown: suite teardown executable
- info: suite info directory
- description: suite description
- disk-image: path of the QEMU image to use
- kernel: path of the kernel to boot the QEMU image
- qemu: path of the QEMU binary to use
- qemu-args: parameters to provide to QEMU for the whole suite
- timeout: maximum time any test can be running before considering it failed
- test1: test1 directory
- setup: test1 setup executable
- teardown: test1 teardown executable
- run: test1 executable
- data: test1 shared folder.
- info: test1 info directory
- description: test1 description
- qemu-args: parameters to provide to qemu for test1 (indicates to the emulated hardware the behaviour expected for this test)
- expect-failure: indicates that this test is expected to fail
- timeout: maximum time testq can be running before considering it failed
Having this structure, the next step was defining how the tests were going to be transferred to QEMU, executed there, and their results retrieved by the Buildbot. And, of course, implementing it. So, we got our hands dirty with python and we implemented a test runner that executes the tests following these steps:
- Prepare the image to be run in QEMU to execute a script when booting (explained in next steps). In order to do this we decided to use qemu-nbd to create a device that contains the image’s filesystem, then mounting it and copying the script where we want it to be. The performace of qemu-nbd is not the best, but that is not critical for this task, as this needs to be done only once per image.
- Then for each of the tests in the suite:
- Create a temporal directory and copy there the setup and teardown (both from the suite and the test) executables, together with the test’s run executable. All the files stored in the test’s data folder are also copied to the temporal directory.
- Launch QEMU emulation. The command to launch the emulation performs several actions:
- Uses the QEMU binary specified in the suite’s qemu file
- Launches the image specified in the suite’s disk-image file
- Launches the image as snapshot, which guarantees that no data gets written to the image (this ensures independence among tests execution)
- Tells the image to boot with the kernel specified in the suite’s kernel file
- Tells QEMU to output the image’s logs by console so they can be collected by the runner
- Makes the temporal directory available inside the client image by using VirtFS
- Contains the parameters defined in both the suite and test’s qemu-args files
- Keeps a timeout for the duration of the emulation. If the timeout is achieved it means that the emulation got hung or didn’t boot, and then the emulation is finished.
- Inside the emulation, after the kernel boot, the script that was deployed in step 1 gets executed. This script
- Mounts the temporal folder shared from the host, containing the binaries and data needed to run the test
- Runs the suite’s setup, test’s setup, test’s run, tests’s teardown and suite’s teardown executables, redirecting their output to log files in that directory. It also stores the exit status of the run executable in a file. This exit status is the one indicating whether the test has passed or not.
- Umounts the temporal folder
- Halts the emulation
- The runner gets the test result, together with the execution logs, from the temporal directory
When launched from console, the execution of the test runner launching the test suite we defined for the FMC TDC driver looks like this:
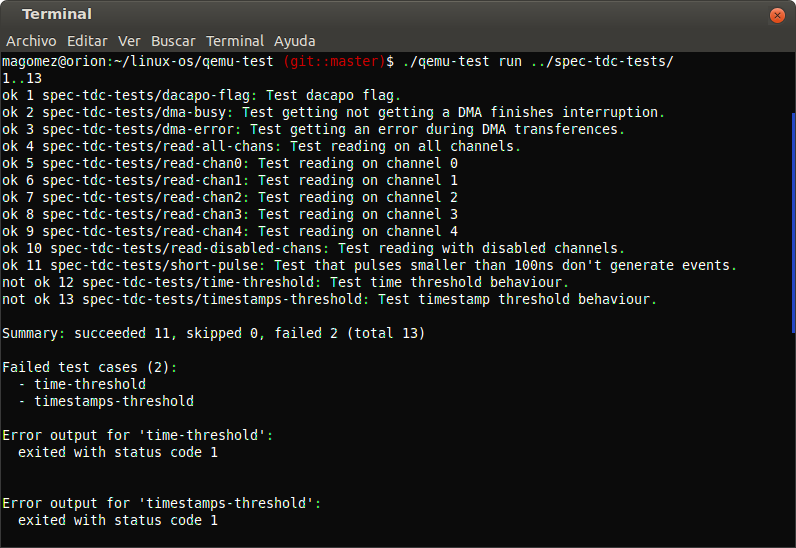
After this, there were only some details remaining to have a working environment. They were mostly configuring Buildbot to properly use the test suite and gather the results, and adding some scripts to perform the compilation of the kernel, the TDC driver and its dependencies, and the test suite itself.
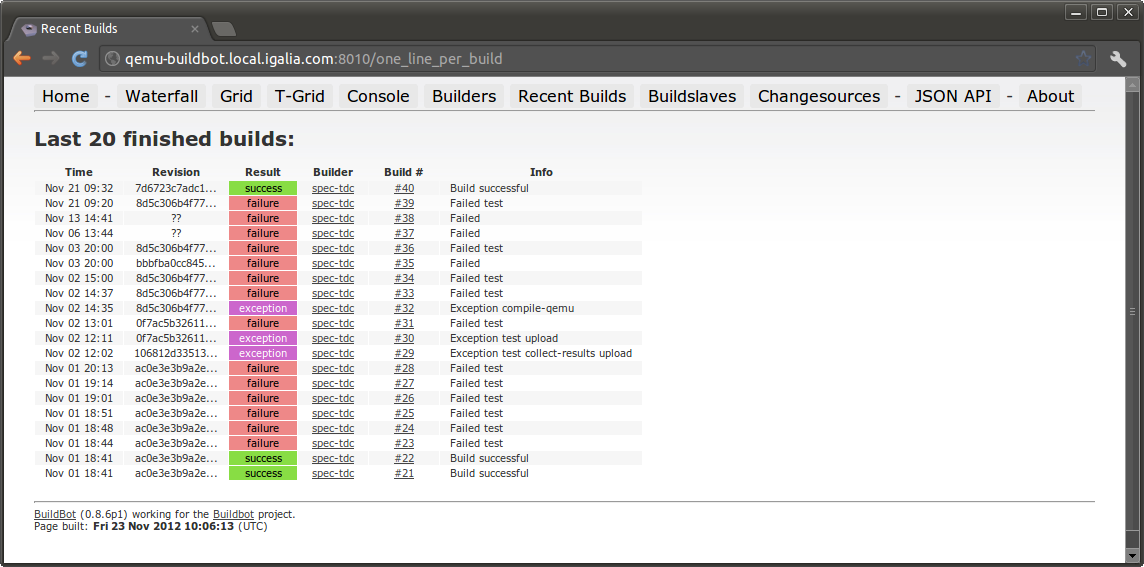
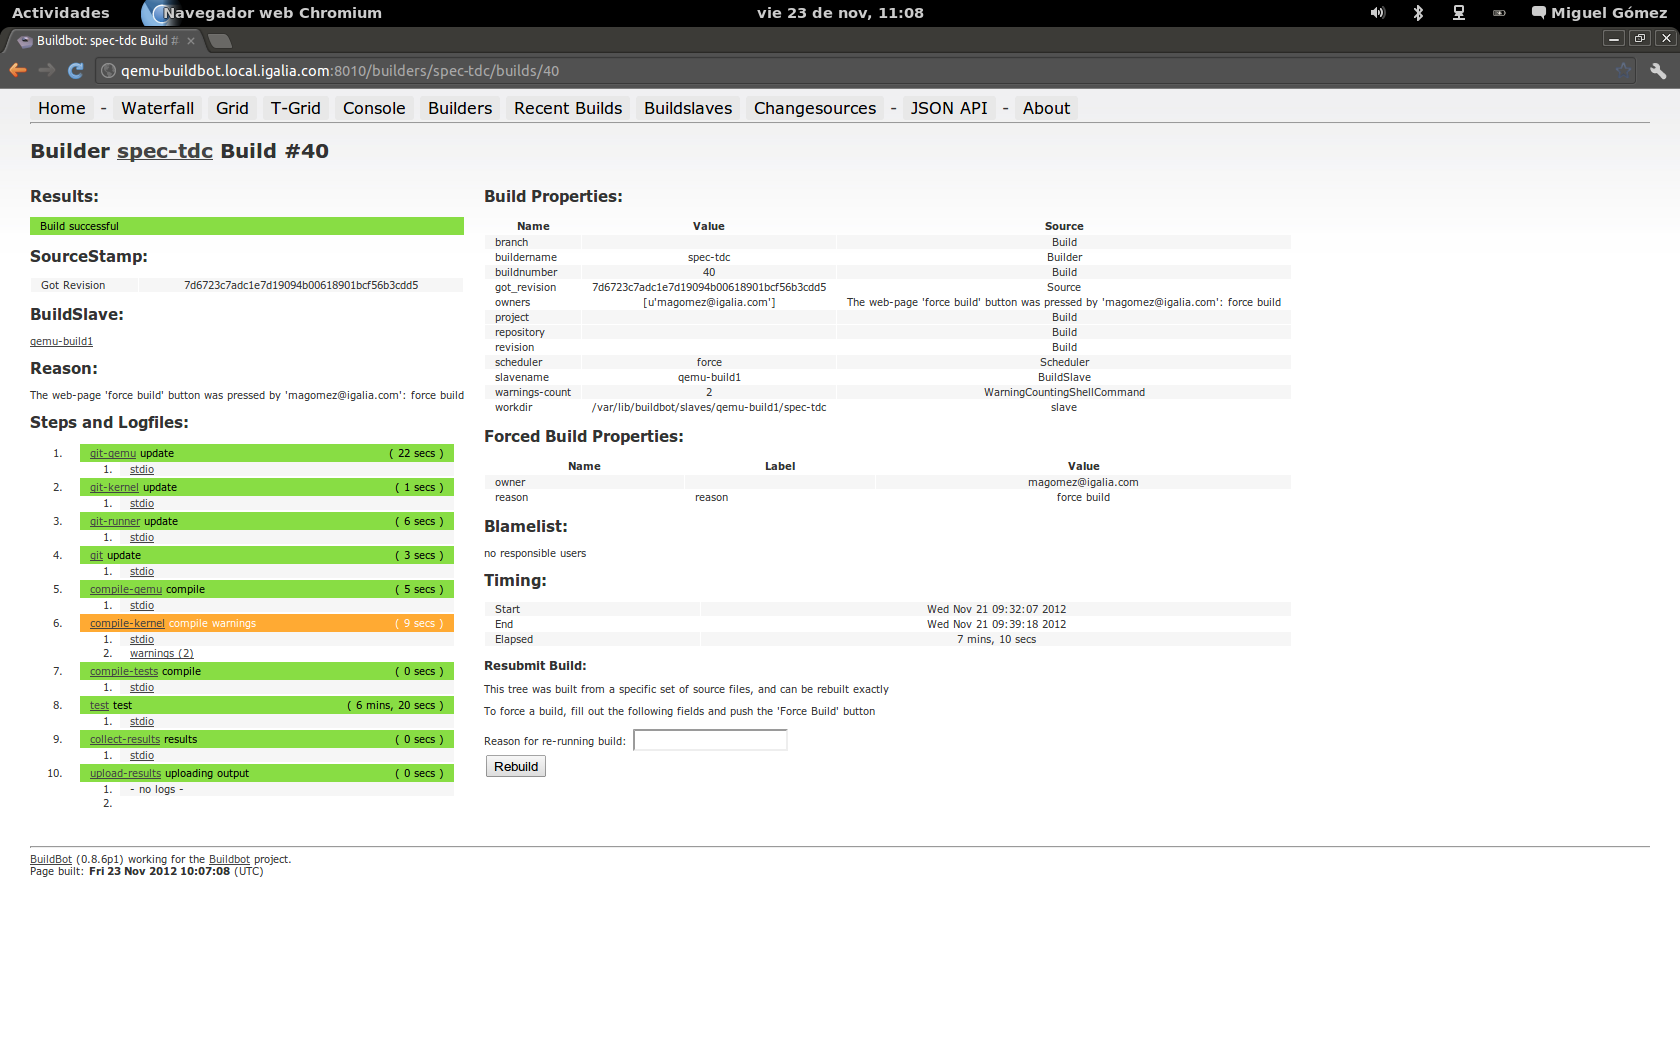
And this is the final result that we got, with Buildbod handling the builds and running the tests.
I have to say that the final result was better than expected. We had defined several key tests for the TDC driver, and they were really useful during the development to ensure that there were no regressions, and also helped ud to test error conditions like buggy DMA transferences, something that was dificult to replicate using real hardware.
We are already planning some improvements and new features to the system, so stay tuned!! 🙂