Unresponsive web processes in WPE and WebKitGTK

In case you’re not familiar with WebKit‘s multiprocess model, allow me to explain some basics: In WebKitGTK and WPE we currently have three main processes which collaborate in order to ultimately render the web pages (this is subject to change, probably with the addition of new processes):

  1. The UI process: this is the process of the application that instantiates the web view. For example, Cog when using WPE or Epiphany when using WebKitGTK. This process is usually in charge of interacting with the user/application and send events and requests to the other processes.
  2. The network process: the goal of this process is to perform network requests for the different web processes and make the results available to them.
  3. The web process: this is the process that really performs the heavy lifting. It’s in charge of requesting the resources required by the page (through the network process), create the DOM tree, execute the JS code, render the content, respond to user events, etc.

In a simple case, we would have a UI process, a web process and a network process working together to render a page. There are situations where (due to security reasons, performance, build options, etc.) the same UI process can be using more than a single web process at the same time, while these share the network process. I won’t go into details about all the possibilities here because that’s beyond the goal of this post (but it’s a good idea for a future post!). If you want more information related to this you can search for topics like process prewarm, process swap on navigation or service workers running on a dedicated processes. In any case, at any given moment, one of those web processes is always the main one performing all the tasks mentioned before, and the others are helpers for concrete tasks, so the situation is equivalent to the simpler case of a single UI process, a web process and an network process.

Developers know that processes have the bad habit of getting hung sometimes, and that can happen here as well to any of the processes. Unfortunately, in many cases that’s probably due to some kind of bug in the code executed by the processes and we can’t do much more about that than fixing the bug. But there’s a special kind of block that affects the web process only, and it’s related to the execution of JS code. Consider this simple JS script for example:

setTimeout(function() {
    while(true) { }
}, 1000);

This will create an infinite loop during the JS execution after one second, blocking the main thread of the web process, and taking 100% of the execution time. The main thread, besides executing the JS code, is also in charge of processing incoming events or messages from the UI process, perform the layout, initiate redraws of the page, etc. But as it’s locked in the JS loop, it won’t be able to perform any of those tasks, causing the web process to become unresponsive to user input or API calls that come through the UI process. There are other situations that could make the process unresponsive, but the execution of faulty JS is probably the most common one.

WebKit has some internal tools to detect these situations, that mainly consist on timeouts that mark the process as unresponsive when some expected reply is not received in time from the web process. But on WebKitGTK and WPE there wasn’t a way to notify the application that’s using the web view that the web process had become unresponsive, or a way to recover from this situation (other than closing the application or the tab). This is fixed in trunk for both ports by adding two components to the WebKitWebView class:

  1. A new property named is-web-process-responsive: this property will signal responsiveness changes of the web process. The application using the web view can connect to the notifications of the object property as with any other GObject class, and can also get the its value using the new webkit_web_view_get_is_web_process_responsive() API method.
  2. A new API method webkit_web_view_terminate_web_process() that can be used kill the web process when it becomes unresponsive (but will also work with responsive ones). Any load performed after this call will spawn a new and shiny web process. When this method is used to kill a web process, the web view will emit the signal web-process-terminated with WEBKIT_WEB_PROCESS_TERMINATED_BY_API as the termination reason.

With these changes, the browser can now connect to the is-web-process-responsive signal changes. If the web process becomes unresponsive, the browser can launch a dialog informing the user of the problem, and ask whether to wait or kill the process. If the user chooses to kill the process, the browser can use webkit_web_view_terminate_web_process() to kill the problematic process and then reload (or load a new page) to go back to functional state.

These changes, among other wonderful features we’re developing at Igalia, will be available on the upcoming 2.34 release of WebKitGTK and WPE. I hope they are useful for you 🙂

Happy coding!

Hole punching in WPE

As you may (or may not) know, WPE (and WebKitGtk+ if the proper flags are enabled) uses OpengGL textures to render the video frames during playback.

In order to do this, WPE creates a playbin and uses a custom bin as videosink. This bin is composed by some GStreamer-GL components together with an appsink. The GL components ensure that the video frames are uploaded to OpenGL textures, while the appsink allows the player to get a signal when a new frame arrives. When this signal is emitted, the player gets the frame as a texture from the appsink and sends it to the accelerated compositor to be composed with the rest of the layers of the page.

This process is quite fast due to the hardware accelerated drawings, and as the video frames are just another layer that is composited, it allows them to be transformed and animated: the video can be scaled, rotated, moved around the page, etc.

But there are some platforms where this approach is not viable, maybe because there’s no OpenGL support, or it’s too slow, or maybe the platform has some kind of fast path support to take the decoded frames to the display. For these cases, the typical solution is to draw a transparent rectangle on the brower, in the position where the video should be, and then use some platform dependent way to put the video frames in a display plane below the browser, so they are visible through the transparent rectangle. This approach is called hole punching, as it refers to punching a hole in the browser to be able to see the video.

At Igalia we think that supporting this feature is interesting, and following our philosophy of collaborating upstream as much as possible, we have added two hole punching approaches to the WPE upstream trunk: GStreamer hole punch and external hole punch.

GStreamer hole punch

The idea behind this implementation is to use the existent GStreamer based MediaPlayer to perform the media playback, but replace the appsink (and maybe other GStreamer elements) with a platform dependant video sink that is in charge of putting the video frames on the display. This can be enabled with the -DUSE_GSTREAMER_HOLEPUNCH flag.

Of course, the current implementation is not complete cause the platform dependent bits need to be added to have the full functionality. What it currently does is to use a fakevideosink so the video frames are not shown, and draw the transparent rectangle on the position where the video should be. If you enable the feature and play a video, you’ll see the transparent rectangle and you’ll be able to hear the video sound (and even use the video controls as they work), but nothing else will happen.

In order to have the full functionality there are a couple of places in the code that need to be modified to create the appropriate platform dependend elements. These two places are inside MediaPlayerPrivateGStreamerBase.cpp, and they are the createHolePunchVideoSink() and setRectangleToVideoSink() functions.

GstElement* MediaPlayerPrivateGStreamerBase::createHolePunchVideoSink()
{
    // Here goes the platform-dependant code to create the videoSink. As a default
    // we use a fakeVideoSink so nothing is drawn to the page.
    GstElement* videoSink =  gst_element_factory_make("fakevideosink", nullptr);

    return videoSink;
}
static void setRectangleToVideoSink(GstElement* videoSink, const IntRect& rect)
{
    // Here goes the platform-dependant code to set to the videoSink the size
    // and position of the video rendering window. Mark them unused as default.
    UNUSED_PARAM(videoSink);
    UNUSED_PARAM(rect);
}

The first one, createHolePunchVideoSink() needs to be modified to create the appropriate video sink to use for the platform. This video sink needs to have some method that allows setting the position where the video frames are to be displayed, and the size they should have. And this is where setRectangleToVideoSink() comes into play. Whenever the transparent rectangle is painted by the browser, it will tell the video sink to render the frames to the appropriate position, and it does so using that function. So you need to modify that function to use the appropriate way to set the size and position to the video sink.

And that’s all. Once those changes are made the feature is complete, and the video should be placed exactly where the transparent rectangle is.

Something to take into account is that the size and position of the video rectangle are defined by the CSS values of the video element. The rectangle won’t be adjusted to fit the aspect ratio of the video, as that must be done by the platform video sink.

Also, the video element allows some animations to be performed: it can be translated and scaled, and it will properly notify the video sink about the animated changes. But, of course, it doesn’t support rotation or 3D transformations (as the normal video playback does). Take into account that there might be a small desynchronization between the transparent rectangle and the video frames size and position, due to the asynchronicity of some function calls.

Playing a video with GStreamer hole punch enabled.

External hole punch

Unlike the previous feature, this one doesn’t rely at all on GStreamer to perform the media playback. Instead, it just paints the transparent rectangle and lets the playback to be handled entirely by an external player.

Of course, there’s still the matter about how to synchronize the transparent rectangle position and the external player. There would be two ways to do this:

  • Implement a new WebKit MediaPlayerPrivate class that would communicate with the external player (through sockets, the injected bundle or any other way). WPE would use that to tell the platform media player what to play and where to render the result. This is completely dependant of the platform, and the most complex solution, but it would allow to use the browser to play content from any page without any change. But precisely as it’s completely platform dependant, this is not valid approach for upstream.
  • Use javascript to communicate with the native player, telling it what to play and where, and WPE would just paint the transparent rectangle. The problem with this is that we need to have control of the page to add the javascript code that controls the native player, but on the other hand, we can implement a generic approach on WPE to paint the transparent rectangle. This is the option that was implemented upstream.

So, how can this feature be used? It’s enabled by using the -DUSE_EXTERNAL_HOLEPUNCH flag, and what it does is add a new dummy MediaPlayer to WPE that’s selected to play content of type video/holepunch. This dummy MediaPlayer will draw the transparent rectangle on the page, according to the CSS values defined, and won’t do anything else. It’s up to the page owners to add the javascript code required to initiate the playback with the native player and position the output in the appropriate place under the transparent rectangle. To be a bit more specific, the dummy player will draw the transparent rectangle once the type has been set to video/holepunch and load() is called on the player. If you have any doubt about how to make this work, you can give a look to the video-player-holepunch-external.html test inside the ManualTests/wpe directory.

This implementation doesn’t support animating the size and position of the video… well, it really does, as the transparent rectangle will be properly animated, but you would need to animate the native player’s output as well, and syncing the rectangle area and the video output is going to be a challenging task.

As a last detail, controls can be enabled using this hole punch implementation, but they are useless. As WPE doesn’t know anything about the media playback that’s happening, the video element controls can’t be used to handle it, so it’s just better to keep them disabled.

Using both implementations together

You may be wondering, is it possible to use both implementations at the same time? Indeed it is!! You may be using the GStreamer holepunch to perform media playback with some custom GStreamer elements. At some point you may find a video that is not supported by GStreamer and you can just set the type of the video element to video/holepunch and start the playback with the native player. And once that video is finished, start using the GStreamer MediaPlayer again.

Availability

Both hole punch features will be available on the upcoming stable 2.24 release (and, of course, on 2.25 development releases). I hope they are useful for you!

WPE: Web Platform for Embedded

WPE is a new WebKit port optimized for embedded platforms that can support a variety of display protocols like Wayland, X11 or other native implementations. It is the evolution of the port formerly known as WebKitForWayland, and it was born as part of a collaboration between Metrological and Igalia as an effort to have a WebKit port running efficiently on STBs.

QtWebKit has been unmaintained upstream since they decided to switch to Blink, hence relying in a dead port for the future of STBs is a no-go. Meanwhile, WebKitGtk+ has been maintained and live upstream which was perfect as a basis for developing this new port, removing the Gtk+ dependency and trying Wayland as a replacement for X server. WebKitForWayland was born!

During a second iteration, we were able to make the Wayland dependency optional, and change the port to use platform specific libraries to implement the window drawings and management. This is very handy for those platforms were Wayland is not available. Due to this, the port was renamed to reflect that Wayland is just one of the several backends supported: welcome WPE!.

WPE has been designed with simplicity and performance in mind. Hence, we just developed a fullscreen browser with no tabs and multimedia support, as small (both in memory usage and disk space) and light as possible.

Current repositories

We are now in the process of moving from the WebKitForWayland repositories to what will be the WPE final ones. This is why this paragraph is about “current repositories”, and why the names include WebKitForWayland instead of WPE. This will change at some point, and expect a new post with the details when it happens. For now, just bear in mind that where it says WebKitForWayland it really refers to WPE.

  • Obviously, we use the main WebKit repository git://git.webkit.org/WebKit.git as our source for the WebKit implementation.
  • Then there are some repositories at github to host the specific WPE bits. This repositories include the needed dependencies to build WPE together with the modifications we did to WebKit for this new port. This is the main WPE repository, and it can be easily built for the desktop and run inside a Wayland compositor. The build and run instructions can be checked here. The mission of these repositories is to be the WPE reference repository, containing the differences needed from upstream WebKit and that are common to all the possible downstream implementations. Every release cycle, the changes in upstream WebKit are merged into this repository to keep it updated.
  • And finally we have Metrological repositories. As in the previous case, we added the dependencies we needed together with the WebKit code. This third’s repository mission is to hold the Metrological specific changes both to WPE and its dependencies, and it also updated from the main WPE repository each release cycle. This version of WPE is meant to be used inside Metrological’s buildroot configuration, which is able to build images for the several target platforms they use. These platforms include all the versions of the Raspberry Pi boards, which are the ones we use as the reference platforms, specially the Raspberry Pi 2, together with several industry specific boards from chip vendors such as Broadcom and Intel.

Building

As I mentioned before, building and running WPE from the main repository is easy and the instructions can be found here.

Building an image for a Raspberry Pi is quite easy as well, just a bit more time consuming because of the cross compiling and the extra dependencies. There are currently a couple of configs at Metrological’s buildroot that can be used and that don’t depend on Metrological’s specific packages. Here are the commands you need to run in order to test it:

    • Clone the buildroot repository:
      git clone https://github.com/Metrological/buildroot-wpe.git
    • Select the buildroot configuration you want. Currently you can use raspberrypi_wpe_defconfig to build for the RPi1 and raspberrypi2_wpe_defconfig to build for the RPi2. This example builds for the RPi2, it can be changed to the RPi1 just changing this command to use the appropriate config. The test of the commands are the same for both cases.
      make raspberrypi2_wpe_defconfig
    • Build the config
      make
    • And then go for a coffee because the build will take a while.
    • Once the build is finished you need to deploy the result to the RPi’s card (SD for the RPi1, microSD for the RPi2). This card must have 2 partitions:
      • boot: fat32 file system, with around 100MB of space.
      • root: ext4 file system with around 500MB of space.
    • Mount the SD card partitions in you system and deploy the build result (stored in output/images) to them. The deploy commands assume that the boot partition was mounted on /media/boot and the root partition was mounted on /media/rootfs:
      cp -R output/images/rpi-firmware/* /media/boot/
      cp output/images/zImage /media/boot/
      cp output/images/*.dtb /media/boot/
      tar -xvpsf output/images/rootfs.tar -C /media/rootfs/
    • Remove the card from your system and plug it to the RPi. Once booted, ssh into it and the browser can be easily launched:
      wpe http://www.igalia.com

Features

I’m planning to write a dedicated post to talk about technical details of the project where I’ll cover this more in deep but, briefly, these are some features that can be found in WPE:

    • support for the common HTML5 features: positioning, CSS, CSS3D, etc
    • hardware accelerated media playback
    • hardware accelerated canvas
    • WebGL
    • MSE
    • MathML
    • Forms
    • Web Animations
    • XMLHttpRequest
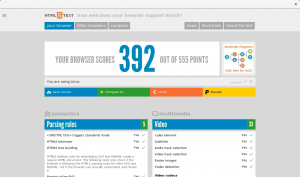
    • and many other features supported by WebKit. If you are interested in the complete list, feel freel to browse to http://html5test.com/ and check it yourself!

captura-de-pantalla-de-2016-12-19-12-09-10

Current adoption status

We are proud to see that thanks to Igalia’s effort together with Metrological, WPE has been selected to replace QtWebKit inside the RDK stack, and that it’s also been adopted by some big cable operators like Comcast (surpassing other options like Chromium, Opera, etc). Also, there are several other STB manufacturers that have shown interest in putting WPE on their boards, which will lead to new platforms supported and more people contributing to the project.

These are really very good news for WPE, and we hope to have an awesome community around the project (both companies and individuals), to collaborate making the engine even better!!

Future developments

Of course, periodically merging upstream changes and, at the same time, keep adding new functionalities and supported platforms to the engine are a very important part of what we are planning to do with WPE. Both Igalia and Metrological have a lot of ideas for future work: finish WebRTC and EME support, improvements to the graphics pipelines, add new APIs, improve security, etc.

But besides that there’s also a very important refactorization that is being performed, and it’s uploading the code to the main WebKit repository as a new port. Basically this means that the main WPE repository will be removed at some point, and its content will be integrated into WebKit. Together with this, we are setting the pieces to have a continuous build and testing system, as the rest of the WebKit ports have, to ensure that the code is always building and that the layout tests are passing properly. This will greatly improve the quality and robustness of WPE.

So, when we are done with those changes, the repository structure will be:

  • The WebKit main repository, with most of the code integrated there
  • Clients/users of WPE will have their own repository with their specific code, and they will merge main repository’s changes directly. This is the case of the Metrological repository.
  • A new third repository that will store WPE’s rendering backends. This code cannot be upstreamed to the WebKit repository as in many cases the license won’t allow it. So only a generic backend will be upstreamed to WebKit while the rest of the backends will be stored here (or in other client specific repositories).

4th generation Classmate PC: accelerometer and extra keys support

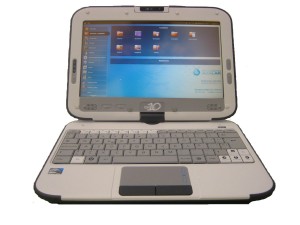
The Intel Classmate PC is a netbook created by Intel that falls into the category of low-cost personal computers, whose target are the children in the developing world.

We have some of those laptops at Igalia, concretely 4th generation ones, due to the collaboration we have with the Xunta de Galicia’s Abalar Project. Historically, the hardware devices of this netbook were fully supported by the linux kernel (through the ACPI_CMPC configuration option), but playing a bit with the 4th generation devices, we realized that both the accelerometer and the extra keys were not working properly.

Well, I’m a member of the Igalia kernel team, so I put my hands into the problem 🙂

Digging a bit I found that the accelerometer was not working because the model had changed from the previous generation. This new hardware was reported with a different ACPI identifier (ACCE0001 instead ACCE0000), and also had some differences with the previous one (that I discovered searching here and there and doing some experimentation, as I wasn’t able to find the specifications)

  • The accelerometer had a new parameter besides the sensibility, the dynamic range, that had to be set to +/-1.5g or +/-6g
  • The value reported by for the axis was in the range (-255, 255), instead of (0, 255) of the previous model
  • It was necessary to set both the sensitivity and the dynamic range every time before starting the operation of the accelerometer, or it wouldn’t work

So I created a patch to handle this new device and sent it to the platform drivers mailing list, and it was accepted 🙂

While talking in the mailing list with the maintainer of the CMPC driver, I also found the reason why the extra keys were not working. The driver for the keys was expecting to handle a device with identifier FnBT0000, but at some point the ACPI support in the kernel changed to report always uppercase identifiers, so the device was reporting FNBT0000. Of course, the comparation is case sensitive, so the driver was not matching the device.
Fixing this was quite easy, so I sent this second patch for it, and it was also integrated.

Both changes were released in the official 3.6 version of the Linux Kernel. Enjoy!! 🙂


Continuous integration and testing, driver development and virtual hardware: the FMC TDC experience

Anyone who has been contributing to the development of drivers for the Linux Kernel is, for sure, familiar with a set of problems that arise during the process:

  1. The testing environment hangs when testing the changes, and you have to reset again and again before you can find the problem (this is a classical one).
  2. The hardware is not available: how am I supposed to develop a driver for a hardware I don’t have?.
  3. There are some configurations in the driver that can’t be tested because they can’t be reproduced at will: the driver is supposed to properly handle error X, but it hasn’t been tested as there’s no way to reproduce it.
  4. When developing non kernel software, it’s possible to have a continuous integration system together with a battery of tests that will run with each code change, ensuring that the changes done compile and don’t cause regressions. But, this is not easily applicable to kernel development, as the testing system is probably going to hang if there’s an error in the code, which is a pain.

At the OS team at Igalia, we have been thinking of a solution to these problems, and we have developed a system that is able to run test batteries on drivers, checking both valid and error situations, by using QEMU to emulate the hardware device that the driver is meant to handle.

The global idea of the system is:

  • Emulate the device you want to work with inside QEMU. Once the specifications of the hardware are available, this is usually easier and faster than getting a real device (which helps with problem 2).
  • Once the hardware is emulated, you can easily launch QEMU instances to test your driver changes and new functionalities. If it hangs or crashes, it’s just a QEMU instance, not your whole environment (bye bye problem 1).
  • Add some code to the emulated hardware so it can force error situations. This allows you to easily test your driver in uncommon situations at will, which removes problem 3.
  • Once at this point, you can perform a really complete test of the driver you’re developing inside QEMU, including error situations, in a controlled and stable environment, so setting a continuous integration and testing system becomes posible (and there goes problem 4!).

So, we decided to follow this structure during the development of the driver for the FMC TDC board we were doing. I was focused on the testing and integration while Alberto was in charge of emulating the hardware and Samuel was dealing with the driver. If you want to know more about these topics you can read their posts about the FMC TDC board emulation and driver development.

We defined this wishlist for the integration and testing system:

  • Changes in the driver code must be automatically integrated and tested.
  • We want to run a set of tests. The result of one test mustn’t affect the result of other tests (the order of execution is irrelevant)
  • Each has a binary that gets executed inside an instance of QEMU and produces a result.
  • We need a way for the test to tell to the emulated hardware how to behave. For example, a test that checks the handling of a concrete error must be able to tell the emulated hardware to force that error.
  • We want to be able to test several kernel versions with different hardware configurations (memory, processors, etc).
  • We need to detect whether the kernel inside QEMU has crashed or got hung, and notify it properly.
  • We want to be able to retrieve logs about everything that happens inside the emulation.

With these ideas in mind, we started the development. We decided to build our system around Buildbot, a well known continuous integration and testing tool. It already supports defining building and testing cycles, and reporting the status through a web page, and is also able to monitor software repositories and start new builds when new commits are added, so it was exactly what we needed.

Once we had the Buildbot, we had to define the structure of our tests and how they were going to be launched. We defined a test suite as a directory containing several tests. Each test is a subdirectory containing a known structure of files and directories containing the relevant stuff. The most relevant items in this directory structure are these, despite we already have some new fields prepared for future developments (bold names are folders while the rest are files):

  • test-suite
    • setup: suite setup executable
    • teardown: suite teardown executable
    • info: suite info directory
      • description: suite description
      • disk-image: path of the QEMU image to use
      • kernel: path of the kernel to boot the QEMU image
      • qemu: path of the QEMU binary to use
      • qemu-args: parameters to provide to QEMU for the whole suite
      • timeout: maximum time any test can be running before considering it failed
    • test1: test1 directory
      • setup: test1 setup executable
      • teardown: test1 teardown executable
      • run: test1 executable
      • data: test1 shared folder.
      • info: test1 info directory
        • description: test1 description
        • qemu-args: parameters to provide to qemu for test1 (indicates to the emulated hardware the behaviour expected for this test)
        • expect-failure: indicates that this test is expected to fail
        • timeout: maximum time testq can be running before considering it failed

Having this structure, the next step was defining how the tests were going to be transferred to QEMU, executed there, and their results retrieved by the Buildbot. And, of course, implementing it. So, we got our hands dirty with python and we implemented a test runner that  executes the tests following these steps:

  • Prepare the image to be run in QEMU to execute a script when booting (explained in next steps). In order to do this we decided to use qemu-nbd to create a device that contains the image’s filesystem, then mounting it and copying the script where we want it to be. The performace of qemu-nbd is not the best, but that is not critical for this task, as this needs to be done only once per image.
  • Then for each of the tests in the suite:
    1. Create a temporal directory and copy there the setup and teardown (both from the suite and the test) executables, together with the test’s run executable. All the files stored in the test’s data folder are also copied to the temporal directory.
    2. Launch QEMU emulation. The command to launch the emulation performs several actions:
      • Uses the QEMU binary specified in the suite’s qemu file
      • Launches the image specified in the suite’s disk-image file
      • Launches the image as snapshot, which guarantees that no data gets written to the image (this ensures independence among tests execution)
      • Tells the image to boot with the kernel specified in the suite’s kernel file
      • Tells QEMU to output the image’s logs by console so they can be collected by the runner
      • Makes the temporal directory available inside the client image by using VirtFS
      • Contains the parameters defined in both the suite and test’s qemu-args files
      • Keeps a timeout for the duration of the emulation. If the timeout is achieved it means that the emulation got hung or didn’t boot, and then the emulation is finished.
    3. Inside the emulation, after the kernel boot, the script that was deployed in step 1 gets executed. This script
      • Mounts the temporal folder shared from the host, containing the binaries and data needed to run the test
      • Runs the suite’s setup, test’s setup, test’s run, tests’s teardown and suite’s teardown executables, redirecting their output to log files in that directory. It also stores the exit status of the run executable in a file. This exit status is the one indicating whether the test has passed or not.
      • Umounts the temporal folder
      • Halts the emulation
    4. The runner gets the test result, together with the execution logs, from the temporal directory

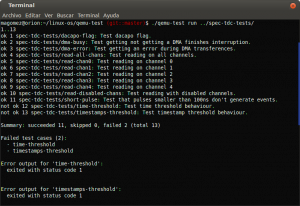
When launched from console, the execution of the test runner launching the test suite we defined for the FMC TDC driver looks like this:

After this, there were only some details remaining to have a working environment. They were mostly configuring Buildbot to properly use the test suite and gather the results, and adding some scripts to perform the compilation of the kernel, the TDC driver and its dependencies, and the test suite itself.

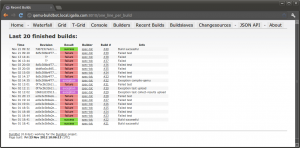
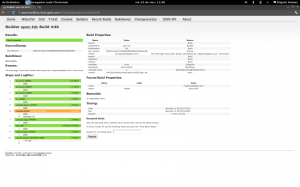
And this is the final result that we got, with Buildbod handling the builds and running the tests.


I have to say that the final result was better than expected. We had defined several key tests for the TDC driver, and they were really useful during the development to ensure that there were no regressions, and also helped ud to test error conditions like buggy DMA transferences, something that was dificult to replicate using real hardware.

We are already planning some improvements and new features to the system, so stay tuned!! 🙂

Currently focused on…

A brief update on what I’ve being doing during last months:

Yes, you have guessed it. Together with some of my colleagues at Igalia, I’m collaborating in the development of the Meego Touch Framework, the (not so) current MeeGo framework for application development. This development is completely open and it’s being performed through its gitorious repository.

Yes, I know QML is here to replace meegotouch as the MeeGo toolkit, but that doesn’t mean that there won’t be Meego Touch based applications anymore. While QML is being polished and getting ready for action, meegotouch is still the framework to use, specially if you need a low level integration with the platform or you want to provide your users with really complex and cool effects. Also, you will probably be able to use Meego Touch components through QML as well 🙂

Expect some posts explaining some of the internals of the library, as it has some cool stuff to show to the world! 😉

On the way to 0.5

It’s been a bit since my last post about siggy. But don’t worry. That only means that I’ve been working hard on it 😉

I’ve made a real lot of changes to the application since version 0.4.2. And I have some more in mind before releasing 0.5. But I wanted to give you an advance of what I’ve been doing and what I plan to do:

  • Things done:
    • Added some performance improvements here and there, mostly related to avoid unnecessary redraws, and modified the hiding of the dialogs. Maybe you have realized that the more expenses you had in a month, the more it took the new expense dialog to hide. That doesn’t happen anymore, and everything runs a bit faster.
    • Added a new feature to the summary section: Evolution. This option uses the expenses graph to show the evolution of your budget and expenses during a period of months. Is has a monthly and accumulated view as the normal graph. Now you can check during with months you spend more money! 😉
    • Source code restructured, making the appearance of the application totally independent of the rest of the code. Thanks to this, creating new views for the application for different platforms is really easy. This is something a normal user won’t notice but I needed it for other goals ;). Also, this was something almost mandatory for someone who likes designing as I do :).
    • Created a desktop version of the application. Yes, siggy now has a desktop version with a view adapted to the desktop environment 🙂
  • Things to do (in a not relevant order):
    • Create a database updater: I’m a slave of the database schema. I have some features in mind that would break the database compatibility with previous versions of the application. This is something I need to fix. I have in mind a program able to update the database schema and migrate existent data when upgrading to a new version.
    • Implement forecasts: I’d like to add the application the capability to tell you how are you going to finish the month according to your current expense rate. Something similar could be done with a period of months.
    • Remove the packaging stuff from the master branch and put it in a different one. Well, you know, code is code, and packaging is packaging 😛
    • Add an rpm packaging branch.
    • Implement the account password protection feature.
    • And last, but not least, create a MeeGo version of the application 🙂

What do you think? Have I been busy or not? 😉
The only bad new is that I’m not planning to create a new package and upload it to garage and those things yet. I’ll probably just create version 0.4.3 in the repository and wait until version 0.5 to create the new package.

Anyway, feel free to get the source code from gitorious and build it yourself. Just launch build.sh and it will create the package for your platform! 🙂

When Grilo met Phonon

You probably know Grilo. It’s a GLib based framework created to ease the task of searching media to application developers. A couple of weeks ago I checked its code a bit and I really liked its plugin based design, and how easy to use it was. And I wanted to test it, of course 🙂

Some of my colleagues had already created some examples with Grilo, like Iago adding it to Totem or José creating a clutter based player. I wanted to do something different, and as I live between the Qt and the Gnome world, I decided to develop a Qt based Grilo application that used Phonon to play the media found by Grilo. If you are interested in the full source, you can clone my public repository at Igalia (http://git.igalia.com/user/magomez/qtgrilo.git).

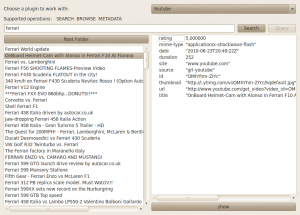
So, step one: create the UI. I got a bit of inspiration from the grilo-test-ui program available with the Grilo sources, and this was the result:

You can choose the plugin to use from the combobox on the top. When a plugin is selected, the operations supported by the plugin are indicated. In the image, the Youtube plugin supports searching, browsing and metadata operations.
The bottom-left list shows the available media. It can be the result of a search, query or browse operation. Double clicking on a list item will browse it if it’s a container or show its metadata if it’s a media file. If the selected media contains an URL field, it will be played by pressing the Show button.

Step two: connect Grilo and the UI. This is really simple. Just add the plugins configuration to the plugin registry (for example the youtube one):

config = grl_config_new ("grl-youtube", NULL);
grl_config_set_api_key (config, YOUTUBE_KEY);
grl_plugin_registry_add_config (registry, config);

Then ask the registry about the available sources and add them to the plugins combo so the user can select one:

GrlMediaPlugin **sources;

sources = grl_plugin_registry_get_sources(registry,
                                          FALSE);

int i = 0;
while (sources[i]) {
    pluginCombo->
        addItem(grl_metadata_source_get_name(GRL_METADATA_SOURCE(sources[i])),
                qVariantFromValue(sources[i]));
    i++;
}
g_free(sources);

Be careful here, as in order to store non Qt typed pointers in QVariants, you need to declare them first, so Qt knows about those types. In this code, I defined the 2 types I stored into QVariants:

Q_DECLARE_METATYPE(GrlMediaPlugin*)
Q_DECLARE_METATYPE(GrlMedia*)

And that’s it.

Then, when the user selects a source, ask for its supported operations. If browsing is supported, do it to fill the browser list with the root folder contents:

GrlSupportedOps ops;
ops = grl_metadata_source_supported_operations(GRL_METADATA_SOURCE(currentPlugin));

if (ops & GRL_OP_SEARCH) {
        opsString += "  SEARCH";
        searchButton->setEnabled(true);
} else {
        searchButton->setEnabled(false);
}
if (ops & GRL_OP_QUERY) {
        opsString += "  QUERY";
        queryButton->setEnabled(true);
} else {
        queryButton->setEnabled(false);
}
if (ops & GRL_OP_BROWSE) {
        opsString += QString("  BROWSE");
        browseButton->setEnabled(true);
        browse();
} else {
        browseButton->setEnabled(false);
}
if (ops & GRL_OP_METADATA) {
        opsString += "  METADATA";
} else {
}

operationsLabel->setText(opsString);

Step three: implement the browse, search and query operations. Again, this is a simple process once you understand how Grilo works, and the implementation of the three operations is quite similar. Basically, you need to call grl_media_source_search/query/browse. Besides some flags and parameters for the search, you indicate the string to search/query or the container to browse, and the callback operation. This callback is called whenever a result arrives, and inside you must decide whether to launch a new search/query/browse to get the next chunk of results. Of course, besides this, I’ve added the obtained media to the browser list, so the user can interact with it.

As I explained in my last post, a class method can be used as a GObject signal callback, so this is what I did here as well. When callback method is called, it receives the class instance as the user_data parameter, so from inside the class method I can call the instance method I need. As an example, these are the 3 functions that implement the search operation: search() is the one called to start the operation, searchFinishedCB is the result callback, and searchMethod is the instance methos that adds the result to the browser and launches the search again if needed.

void TestWindow::search()
{
        cancelCurrentOperation();
        clearBrowser();

        string = g_strdup(searchEdit->text().toLatin1());
        currentOpId = grl_media_source_search(GRL_MEDIA_SOURCE(currentPlugin),
                                              string,
                                              grl_metadata_key_list_new(GRL_METADATA_KEY_ID,
                                                                        GRL_METADATA_KEY_TITLE,
                                                                        GRL_METADATA_KEY_CHILDCOUNT,
                                                                        NULL),
                                              0,
                                              BROWSE_CHUNK_SIZE,
                                              (GrlMetadataResolutionFlags)BROWSE_FLAGS,
                                              searchFinishedCB,
                                              this);

}

void TestWindow::searchFinishedCB(GrlMediaSource *source,
                                  guint search_id,
                                  GrlMedia *media,
                                  guint remaining,
                                  gpointer user_data,
                                  const GError *error)
{
        if (!error && media) {
                TestWindow *win = (TestWindow*)user_data;
                win->searchFinished(search_id, media, remaining);
        }

}
void TestWindow::searchFinished(guint search_id,
                                GrlMedia *media,
                                guint remaining)
{
        QString name(grl_media_get_title(media));
        QStandardItem *item = new QStandardItem();
        if (GRL_IS_MEDIA_BOX(media)) {
                QFont font;
                font.setBold(true);
                item->setFont(font);
                gint children = grl_media_box_get_childcount(GRL_MEDIA_BOX(media));
                if (children == GRL_METADATA_KEY_CHILDCOUNT_UNKNOWN) {
                        name += QString(" (?)");
                } else {
                        name += QString(" (%1)").arg(children);
                }
        }
        item->setText(name);
        item->setData(qVariantFromValue(media));
        item->setEditable(false);
        browseModel->appendRow(item);
        operationResults++;

        if (remaining == 0) {
                operationOffset += operationResults;
                if (operationResults >= BROWSE_CHUNK_SIZE &&
                    operationOffset < BROWSE_MAX_COUNT) {
                        operationResults = 0;
                        /* relaunch search */
                        currentOpId = 
                                grl_media_source_search(GRL_MEDIA_SOURCE(currentPlugin),
                                                        string,
                                                        grl_metadata_key_list_new(GRL_METADATA_KEY_ID,
                                                                                  GRL_METADATA_KEY_TITLE,
                                                                                  GRL_METADATA_KEY_CHILDCOUNT,
                                                                                  NULL),
                                                        operationOffset,
                                                        BROWSE_CHUNK_SIZE,
                                                        (GrlMetadataResolutionFlags)BROWSE_FLAGS,
                                                        searchFinishedCB,
                                                        this);
                }
        }
}

After implementing the search, query and browse operations, I implemented the metadata operation as well. So when the user selects and element in the browser, its metadata is retrieved and shown. Its implementation is quite similar to the browse/query/search operations as well, but it doesn’t need to be relaunched as them.

So, the next and final step was playing the media. I started with videos and audio, as using Phonon it was really easy:

void TestWindow::playVideo()
{
        Phonon::VideoWidget *videoWidget = new Phonon::VideoWidget();
        videoWidget->setAttribute(Qt::WA_DeleteOnClose);

        Phonon::MediaObject *mediaObject = new Phonon::MediaObject(videoWidget);
        mediaObject->setCurrentSource(Phonon::MediaSource(QUrl(QString::fromUtf8(grl_media_get_url(currentMedia)))));
        Phonon::AudioOutput *audioOutput = new Phonon::AudioOutput(Phonon::VideoCategory, videoWidget);
        Phonon::createPath(mediaObject, audioOutput);
        Phonon::createPath(mediaObject, videoWidget);
        videoWidget->show();
        mediaObject->play();
}

void TestWindow::playAudio()
{
        QMessageBox msgBox;
        msgBox.setText(QString("Playing %1").arg(grl_media_get_title(currentMedia)));

        Phonon::MediaObject *mediaObject = new Phonon::MediaObject(&msgBox);
        mediaObject->setCurrentSource(Phonon::MediaSource(QUrl(QString::fromUtf8(grl_media_get_url(currentMedia)))));
        Phonon::AudioOutput *audioOutput = new Phonon::AudioOutput(Phonon::MusicCategory, &msgBox);
        createPath(mediaObject, audioOutput);
        mediaObject->play();
        msgBox.exec();
}

Understanding how Phonon works is quite easy when you have learned to use GStreamer first, as the concepts are almost the same (despite Phonon is far easier to use). Basically you need to create a MediaObject and tell it where to get the data. Then create an AudioOutput for the audio, a VideoWidget for the video, connect them and then set the playing state. I was a bit short of time to implement a more featured player, but I wanted to provide a way to stop the playback once started, so it’s stopped when the output window (if it’s a video) or the dialog with the title (if it’s an audio file) are closed.

And finally, the image files. Opening them when they were local files is trivial. But when they are remote ones, you need to download them first. In order to do so, you to use a QNetworkAccessManager, which is the class in charge of the network access. Just use its get() to make a request, and it will notify with a signal when the data has arrived, as you can see in the code:

netManager = new QNetworkAccessManager(this);
connect(netManager, SIGNAL(finished(QNetworkReply*)),
                this, SLOT(netRequestFinished(QNetworkReply*)));

...

void TestWindow::playImage()
{
        QUrl url(QString::fromUtf8(grl_media_get_url(currentMedia)));

        if (url.scheme() == "file") {
                QScrollArea *area= new QScrollArea();
                area->setAttribute(Qt::WA_DeleteOnClose);
                QLabel *label = new QLabel();
                label->setPixmap(QPixmap(url.path()));
                area->setWidget(label);
                area->show();
        } else {
                netManager->get(QNetworkRequest(url));
        }
}

...

void TestWindow::netRequestFinished(QNetworkReply *reply)
{
        QScrollArea *area= new QScrollArea();
        area->setAttribute(Qt::WA_DeleteOnClose);
        QLabel *label = new QLabel();
        QPixmap pix;
        pix.loadFromData(reply->readAll());
        label->setPixmap(pix);
        area->setWidget(label);
        area->show();
        reply->deleteLater();
}

And that’s all… well, almost all… for some reason I haven’t found yet, opening youtube videos is not working, despite I’ve checked the URLs and the videos work if they are atored in the computer… I might be a bug with Phonon but I haven’t found it yet…

As you can see, using Grilo is really easy… even if you decide to mix it with Qt! 🙂

A camera using GDigicam and Qt

You may (or not 😉 ) know that GDigicam is an open source library used in Maemo 5 as a middleware betweeen the camera application and the GStreamer stuff. The goal of the library is to ease the development of camera style applications by hiding the low level stuff to the UI developers, and it allows different GStreamer pipelines to be used in the lower layers to achieve the camera funcionality. Currently the camerabin plugin is the fully supported one, and it’s also the one being used for the N900 camera.

I had the chance to collaborate in the development of the GDigicam library time ago, and it’s currently maintained by some of my colleagues at Igalia. One of them asked me some days ago about the possibility of using GDigicam together with Qt to develop a camera application. You know how this works… that seed was enough to awake my curiosity, so I started working on it 🙂

Some tests later, I’ve developed an experiment integrating both things. A Qt application that uses GDigicam to display a viewfinder in a Qt window, and to get pictures and show a preview of them. I must confess that I got really surprised because it was a really simple task. You can clone my personal repository (http://git.igalia.com/user/magomez/qtcamera.git) if you want to check the code. These are the steps I followed and the tricky parts of the code 🙂

First, extend the QWidget to create a CamWindow widget. In the CamWindow constructor, create the GDigicamManager, the GStreamer camerabin plugin, the GDigicamDescriptor and fill the bin capabilities (this is done in the setupCamerabin method). Connect the callbacks to the GDigicam desired signals and set the initial configuration. In the example, I used CamWindow’s static methods as callbacks of the GDigicam signals. This is fine as long as you don’t need the CamWindow instance. If you need it, then you’ll have to set it as the callback user_data parameter when connecting the signal (as in the preview signal case).

void CamWindow::setupGDigicam()
{
    GstElement *bin;
    GDigicamDescriptor *descriptor = NULL;

    /* create the GDigicamManager */
    manager = g_digicam_manager_new();
    colorkey = 0;

    /* create the bin */
    bin = g_digicam_camerabin_element_new ("v4l2camsrc",
                                           "dspmp4venc",
                                           "hantromp4mux",
                                           "pulsesrc",
                                           "nokiaaacenc",
                                           "jpegenc",
                                           NULL,
                                           "xvimagesink",
                                           &colorkey);

    /* create and fill the descriptor*/
    descriptor = g_digicam_camerabin_descriptor_new (bin);
    descriptor->max_zoom_macro_enabled = 6;
    descriptor->max_zoom_macro_disabled = 6;
    descriptor->max_digital_zoom = 6;


..... more descriptor capabilities stuff....


    /* set the bin and the descriptor to the manager */
    g_digicam_manager_set_gstreamer_bin (manager,
                                         bin,
                                         descriptor,
                                         NULL);

    /* connect to the manager's signals */
    g_signal_connect (manager, "pict-done",
                     (GCallback) captureDone,
                      NULL);
    g_signal_connect (manager, "capture-start",
                     (GCallback) captureStart,
                      NULL);
    g_signal_connect (manager, "capture-end",
                     (GCallback) captureEnd,
                      NULL);
    g_signal_connect (manager, "image-preview",
                     (GCallback) imagePreview,
                      this);

    /* set initial configuration */
    setOperationMode(G_DIGICAM_MODE_STILL);
    setResolution(G_DIGICAM_RESOLUTION_HIGH,
                  G_DIGICAM_ASPECTRATIO_16X9);
    setFlashMode(G_DIGICAM_FLASHMODE_AUTO);
    enablePreview(true);
}

I’ve created some private members in CamWindow to encapsulate the GDigicam function calls. They are used for initialization and also called through the options in the window menu (change resolution, play/stop bin) and when clicking the capture button. This is the one to set the resolution for example:

void CamWindow::setResolution(GDigicamResolution res,
                              GDigicamAspectratio ar)
{
    GDigicamCamerabinAspectRatioResolutionHelper *helper = NULL;

    helper = g_slice_new (GDigicamCamerabinAspectRatioResolutionHelper);
    helper->resolution = res;
    helper->aspect_ratio = ar;

    g_digicam_manager_set_aspect_ratio_resolution (manager,
                                                   helper->aspect_ratio,
                                                   helper->resolution,
                                                   NULL,
                                                   helper);

    g_slice_free (GDigicamCamerabinAspectRatioResolutionHelper, helper);
}

One of the capabilities of the camerabin is that through the use of a colorkey, it allows blending UI components over the video stream. To make this work, the background of the window where the video is put must be filled wit the colorley color (this color is provided when creating the camerabin element). This is why this is done in the paintEvent method of the window:

void CamWindow::paintEvent (QPaintEvent *)
{
    QPainter painter(this);
    QBrush brush;

    QColor color((colorkey & 0x00ff0000) >> 16,
                 (colorkey & 0x0000ff00) >> 8,
                  colorkey & 0x000000ff);

    painter.save();
    painter.fillRect(0, 0, width(), height(), color);
    painter.restore ();
}

This done, by calling g_digicam_manager_play_bin() and g_digicam_manager_stop_bin(), you can control the viewfinder running on the window. The g_digicam_manager_play_bin() function received the XWindow id of the widget, which is obtained through the winId() member of QWidget.

Finally, when the pipeline is running, by calling g_digicam_camerabin_get_still_picture(), you can capture a picture. When doing so, besides the picture being stored in the provided path, the manager will emit (if preview is active) a signal containing a preview of the captured picture. In order to show this preview, I connected the imagePreview member of CamWindow to the preview signal. Inside this method, the GdkPixbuf received is turned into a QImage and then a QPixmap that is shown in a new window:

void CamWindow::imagePreview(GDigicamManager *manager,
                             GdkPixbuf *preview,
                             gpointer data)
{
    QLabel *label = new QLabel();
    label->setAttribute(Qt::WA_DeleteOnClose);
    label->setWindowFlags(label->windowFlags() | Qt::Window);

    QImage image(gdk_pixbuf_get_pixels(preview),
                 gdk_pixbuf_get_width(preview),
                 gdk_pixbuf_get_height(preview),
                 gdk_pixbuf_get_rowstride(preview),
                 QImage::Format_RGB888);

   QPixmap pixmap(QPixmap::fromImage(image));
                  label->setPixmap(pixmap);
                  label->show();
}

If you get the code and run the example in an N900, you will see a window with a capture button. Go to the menu, select play and the viewfinder will show up (and capture button will be over it!). You can change the resolution of the picture through the menu, and press the capture button to get a picture, and see the preview of the capture in a new window. For the moment, those are the features I’ve implemented in the example.

It’s quite simple, isn’t it? 🙂