Lately I have been working on a simple terrain OpenGL renderer demo, mostly to have a playground where I could try some techniques like shadow mapping and water rendering in a scenario with a non trivial amount of geometry, and I thought it would be interesting to write a bit about it.
But first, here is a video of the demo running on my old Intel IvyBridge GPU:
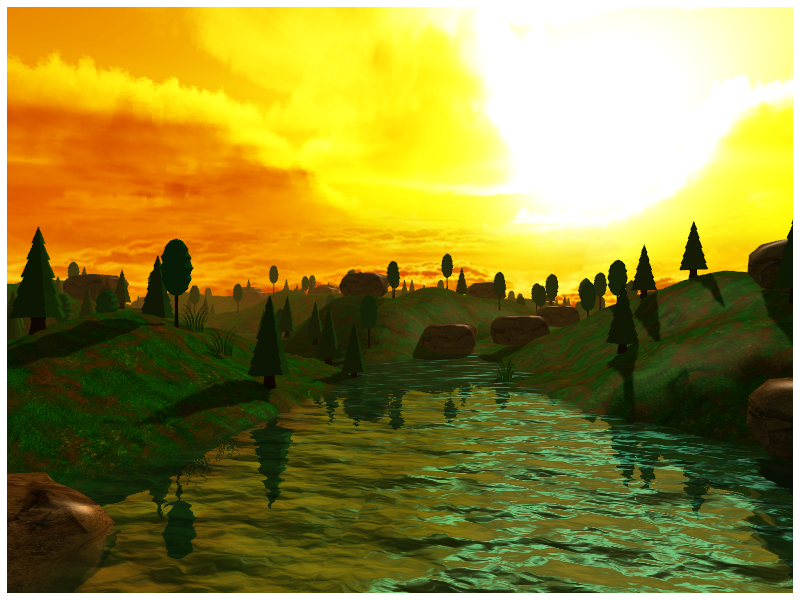
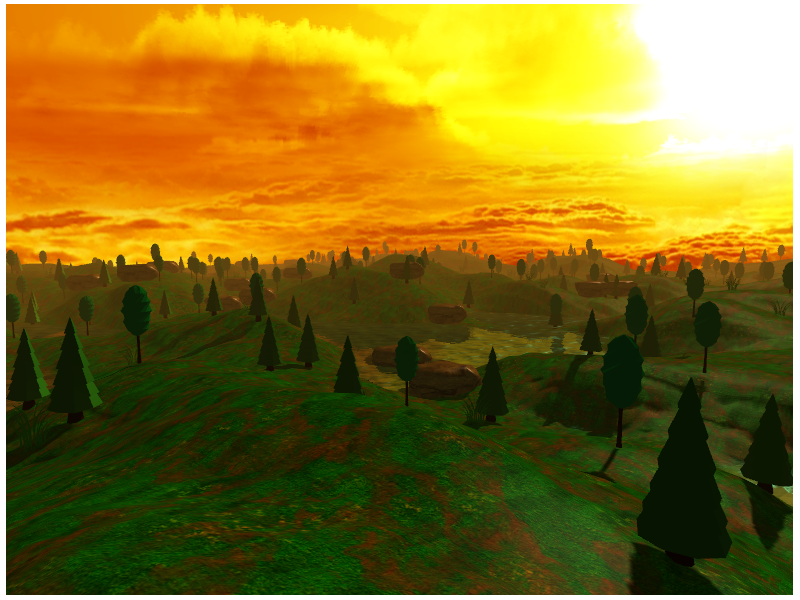
And some screenshots too:
 |
 |
 |
 |
Note that I did not create any of the textures or 3D models featured in the video.
With that out of the way, let’s dig into some of the technical aspects:
The terrain is built as a 251×251 grid of vertices elevated with a heightmap texture, so it contains 63,000 vertices and 125,000 triangles. It uses a single 512×512 texture to color the surface.
The water is rendered in 3 passes: refraction, reflection and the final rendering. Distortion is done via a dudv map and it also uses a normal map for lighting. From a geometry perspective it is also implemented as a grid of vertices with 750 triangles.
I wrote a simple OBJ file parser so I could load some basic 3D models for the trees, the rock and the plant models. The parser is limited, but sufficient to load vertex data and simple materials. This demo features 4 models with these specs:
- Tree A: 280 triangles, 2 materials.
- Tree B: 380 triangles, 2 materials.
- Rock: 192 triangles, 1 material (textured)
- Grass: 896 triangles (yes, really!), 1 material.
The scene renders 200 instances of Tree A another 200 instances of Tree B, 50 instances of Rock and 150 instances of Grass, so 600 objects in total.
Object locations in the terrain are randomized at start-up, but the demo prevents trees and grass to be under water (except for maybe their base section only) because it would very weird otherwise :), rocks can be fully submerged though.
Rendered objects fade in and out smoothly via alpha blending (so there is no pop-in/pop-out effect as they reach clipping planes). This cannot be observed in the video because it uses a static camera but the demo supports moving the camera around in real-time using the keyboard.
Lighting is implemented using the traditional Phong reflection model with a single directional light.
Shadows are implemented using a 4096×4096 shadow map and Percentage Closer Filter with a 3x3 kernel, which, I read is (or was?) a very common technique for shadow rendering, at least in the times of the PS3 and Xbox 360.
The demo features dynamic directional lighting (that is, the sun light changes position every frame), which is rather taxing. The demo also supports static lighting, which is significantly less demanding.
There is also a slight haze that builds up progressively with the distance from the camera. This can be seen slightly in the video, but it is more obvious in some of the screenshots above.
The demo in the video was also configured to use 4-sample multisampling.
As for the rendering pipeline, it mostly has 4 stages:
- Shadow map.
- Water refraction.
- Water reflection.
- Final scene rendering.
A few notes on performance as well: the implementation supports a number of configurable parameters that affect the framerate: resolution, shadow rendering quality, clipping distances, multi-sampling, some aspects of the water rendering, N-buffering of dynamic VBO data, etc.
The video I show above runs at locked 60fps at 800×600 but it uses relatively high quality shadows and dynamic lighting, which are very expensive. Lowering some of these settings (very specially turning off dynamic lighting, multisampling and shadow quality) yields framerates around 110fps-200fps. With these settings it can also do fullscreen 1600×900 with an unlocked framerate that varies in the range of 80fps-170fps.
That’s all in the IvyBridge GPU. I also tested this on an Intel Haswell GPU for significantly better results: 160fps-400fps with the “low” settings at 800×600 and roughly 80fps-200fps with the same settings used in the video.
So that’s it for today, I had a lot of fun coding this and I hope the post was interesting to some of you. If time permits I intend to write follow-up posts that go deeper into how I implemented the various elements of the demo and I’ll probably also write some more posts about the optimization process I followed. If you are interested in any of that, stay tuned for more.
Very cool. I’d love to see a link to the code.
Hey Ben, thanks!
I’ll be uploading this to github some time soon I hope, I just want to clean-up a number of things before I take that step.
Same as what Ben said! This is very cool, keep up the good work!