Introduction
The Steam Deck is a handheld gaming computer that runs a Linux-based operating system called SteamOS. The machine comes with SteamOS 3 (code name “holo”), which is in turn based on Arch Linux.
Although there is no SteamOS 3 installer for a generic PC (yet), it is very easy to install on a virtual machine using QEMU. This post explains how to do it.
The goal of this VM is not to play games (you can already install Steam on your computer after all) but to use SteamOS in desktop mode. The Gaming mode (the console-like interface you normally see when you use the machine) requires additional development to make it work with QEMU and will not work with these instructions.
A SteamOS VM can be useful for debugging, development, and generally playing and tinkering with the OS without risking breaking the Steam Deck.
Running the SteamOS desktop in a virtual machine only requires QEMU and the OVMF UEFI firmware and should work in any relatively recent distribution. In this post I’m using QEMU directly, but you can also use virt-manager or some other tool if you prefer, we’re emulating a standard x86_64 machine here.
General concepts
SteamOS is a single-user operating system and it uses an A/B partition scheme, which means that there are two sets of partitions and two copies of the operating system. The root filesystem is read-only and system updates happen on the partition set that is not active. This allows for safer updates, among other things.
There is one single /home partition, shared by both partition sets. It contains the games, user files, and anything that the user wants to install there.
Although the user can trivially become root, make the root filesystem read-write and install or change anything (the pacman package manager is available), this is not recommended because
- it increases the chances of breaking the OS, and
- any changes will disappear with the next OS update.
A simple way for the user to install additional software that survives OS updates and doesn’t touch the root filesystem is Flatpak. It comes preinstalled with the OS and is integrated with the KDE Discover app.
Preparing all the necessary files
The first thing that we need is the installer. For that we have to download the Steam Deck recovery image from here: https://store.steampowered.com/steamos/download/?ver=steamdeck&snr=
Once the file has been downloaded, we can uncompress it and we’ll get a raw disk image called steamdeck-recovery-4.img (the number may vary).
Note that the recovery image is already SteamOS (just not the most up-to-date version). If you simply want to have a quick look you can play a bit with it and skip the installation step. In this case I recommend that you extend the image before using it, for example with ‘truncate -s 64G steamdeck-recovery-4.img‘ or, better, create a qcow2 overlay file and leave the original raw image unmodified: ‘qemu-img create -f qcow2 -F raw -b steamdeck-recovery-4.img steamdeck-recovery-extended.qcow2 64G‘
But here we want to perform the actual installation, so we need a destination image. Let’s create one:
$ qemu-img create -f qcow2 steamos.qcow2 64G
Installing SteamOS
Now that we have all files we can start the virtual machine:
$ qemu-system-x86_64 -enable-kvm -smp cores=4 -m 8G \
    -device usb-ehci -device usb-tablet \
    -device intel-hda -device hda-duplex \
    -device VGA,xres=1280,yres=800 \
    -drive if=pflash,format=raw,readonly=on,file=/usr/share/ovmf/OVMF.fd \
    -drive if=virtio,file=steamdeck-recovery-4.img,driver=raw \
    -device nvme,drive=drive0,serial=badbeef \
    -drive if=none,id=drive0,file=steamos.qcow2
Note that we’re emulating an NVMe drive for steamos.qcow2 because that’s what the installer script expects.
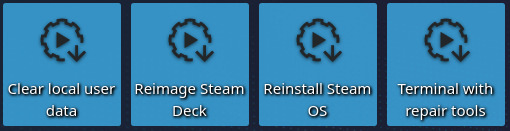
Once the system has booted we’ll see a KDE Plasma session with a few tools on the desktop. If we select “Wipe Device & Install SteamOS” (or “Reimage Steam Deck” in older images) and click “Proceed” on the confirmation dialog then SteamOS will be installed on the destination drive. This process should not take a long time.
Now, once the operation finishes a new confirmation dialog will ask if we want to reboot the Steam Deck. If we are using the SteamOS 3.7 recovery image or a more recent one then we are done. We can shut down the virtual machine and skip the rest of this section. This is because once we boot the OS it will detect that it’s running inside a VM and will go straight to Desktop Mode.
If we are using an older recovery image then we have to choose “Cancel”. We cannot use the new image yet because it would try to boot into Gaming Mode, which won’t work, so we need to change the default desktop session.
SteamOS comes with a helper script that allows us to enter a chroot after automatically mounting all SteamOS partitions, so let’s open a Konsole and make the Plasma session the default one in both partition sets(*):
$ cd /dev

$ sudo steamos-chroot --disk nvme0n1 --partset A --no-overlay
# steamos-readonly disable
# echo '[Autologin]' > /etc/sddm.conf.d/zz-steamos-autologin.conf
# echo 'Session=plasma.desktop' >> /etc/sddm.conf.d/zz-steamos-autologin.conf
# steamos-readonly enable
# exit

$ sudo steamos-chroot --disk nvme0n1 --partset B --no-overlay
# steamos-readonly disable
# echo '[Autologin]' > /etc/sddm.conf.d/zz-steamos-autologin.conf
# echo 'Session=plasma.desktop' >> /etc/sddm.conf.d/zz-steamos-autologin.conf
# steamos-readonly enable
# exit
After this we can shut down the virtual machine. Our new SteamOS drive is ready to be used. We can discard the recovery image now if we want.
(*) Note: in older recovery images the --no-overlay option is not supported. We use cd /dev in this example because some versions of steamos-chroot don’t work well with absolute paths.
Booting SteamOS and first steps
To boot SteamOS we can use a QEMU line similar to the one used during the installation. This time we’re not emulating an NVMe drive because it’s no longer necessary.
$ cp /usr/share/OVMF/OVMF_VARS.fd .
$ qemu-system-x86_64 -enable-kvm -smp cores=4 -m 8G \
   -device usb-ehci -device usb-tablet \
   -device intel-hda -device hda-duplex \
   -device VGA,xres=1280,yres=800 \
   -drive if=pflash,format=raw,readonly=on,file=/usr/share/ovmf/OVMF.fd \
   -drive if=pflash,format=raw,file=OVMF_VARS.fd \
   -drive if=virtio,file=steamos.qcow2 \
   -device virtio-net-pci,netdev=net0 \
   -netdev user,id=net0,hostfwd=tcp::2222-:22
(the last two lines redirect tcp port 2222 to port 22 of the guest to be able to SSH into the VM. If you don’t want to do that you can omit them)
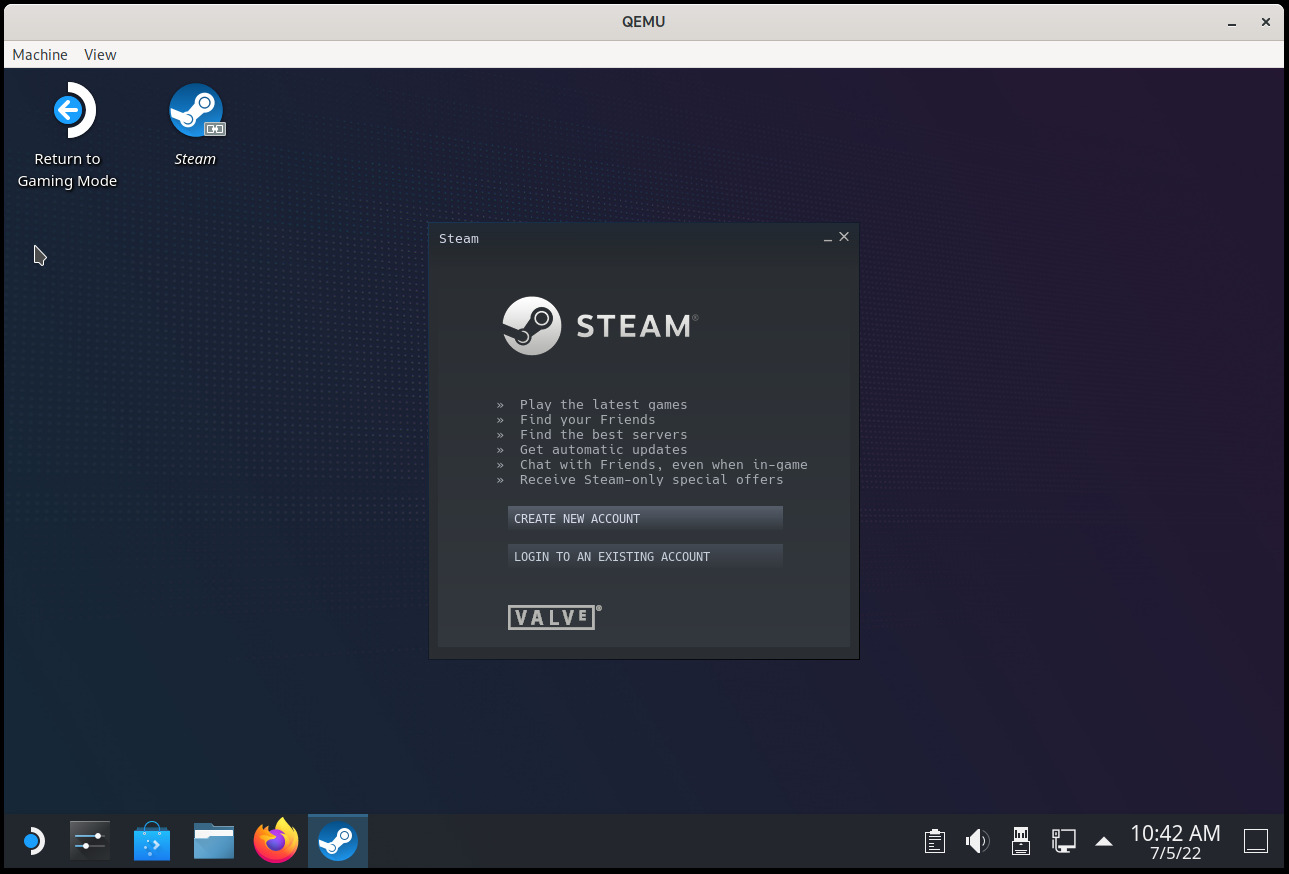
If everything went fine, you should see KDE Plasma again, this time with a desktop icon to launch Steam and another one to “Return to Gaming Mode” (which we should not use because it won’t work). See the screenshot that opens this post.
Congratulations, you’re running SteamOS now. Here are some things that you probably want to do:
- (optional) Change the keyboard layout in the system settings (the default one is US English)
- Set the password for the
deck user: run ‘passwd‘ on a terminal
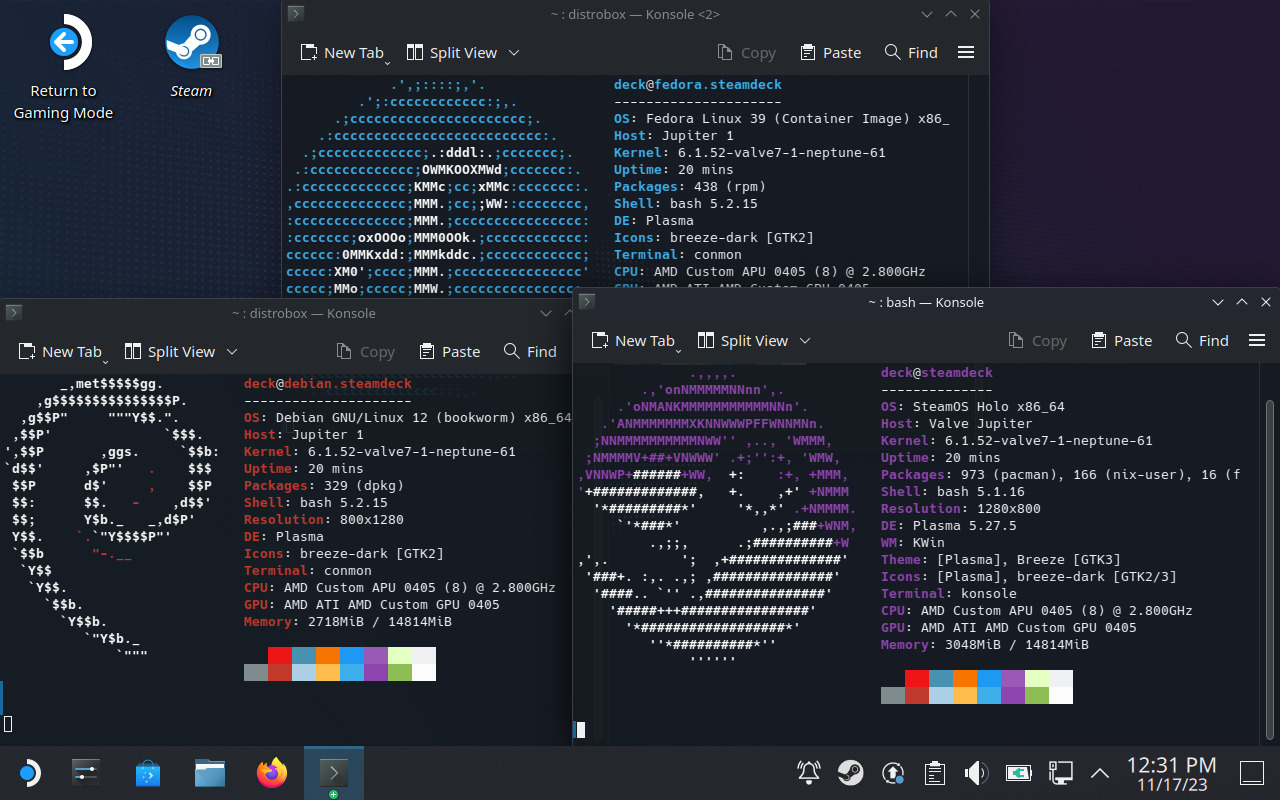
- Enable / start the SSH server: ‘
sudo systemctl enable sshd‘ and/or ‘sudo systemctl start sshd‘.
- SSH into the machine: ‘
ssh -p 2222 deck@localhost‘
Updating the OS to the latest version
The Steam Deck recovery image doesn’t install the most recent version of SteamOS, so now we should probably do a software update.
- First of all ensure that you’re giving enought RAM to the VM (in my examples I run QEMU with
-m 8G). The OS update might fail if you use less.
- (optional) Change the OS branch if you want to try the beta release: ‘
sudo steamos-select-branch beta‘ (or main, if you want the bleeding edge)
- Check the currently installed version in
/etc/os-release (see the BUILD_ID variable)
- Check the available version: ‘
steamos-update check‘
- Download and install the software update: ‘
steamos-update‘
Note: if the last step fails after reaching 100% with a post-install handler error then go to Connections in the system settings, rename Wired Connection 1 to something else (anything, the name doesn’t matter), click Apply and run steamos-update again. This works around a bug in the update process. Recent images fix this and this workaround is not necessary with them.
If we updated to SteamOS 3.7 or a more recent version then we are done and we can restart the system. With earlier versions, and as explained in the previous section, before rebooting we should ensure that the new update boots into the Plasma session, otherwise it won’t work:
$ sudo steamos-chroot --partset other
# steamos-readonly disable
# echo '[Autologin]' > /etc/sddm.conf.d/zz-steamos-autologin.conf
# echo 'Session=plasma.desktop' >> /etc/sddm.conf.d/zz-steamos-autologin.conf
# steamos-readonly enable
# exit
After this we can restart the system.
If everything went fine we should be running the latest SteamOS release. Enjoy!
Reporting bugs
SteamOS is under active development. If you find problems or want to request improvements please go to the SteamOS community tracker.
Edit 06 Jul 2022: Small fixes, mention how to install the OS without using NVMe.
Edit 04 Apr 2024: add –no-overlay to the steamos-chroot command line. This is required in recent recovery images.
Edit 28 Jul 2025: Update instructions for the SteamOS 3.7.7 (20250521.10) recovery image.