Working with WebKit and GStreamer logs in Emacs.
WebKit has grown into a massive codebase throughout the years. To make developers’ lives easier, it offers various subsystems and integrations. One such subsystem is a logging subsystem that offers the recording of textual logs describing an execution of the internal engine parts.
The logging subsystem in WebKit (as in any computer system), is usually used for both debugging and educational purposes. As WebKit is a widely-used piece of software that runs on everything ranging from desktop-class devices up to low-end embedded devices, it’s not uncommon that logging is sometimes the only way for debugging when various limiting factors come into play. Such limiting factors don’t have to be only technical - it may also be that the software runs on some restricted systems and direct debugging is not allowed.
Requirements for efficient work with textual logs #
Regardless of the reasons why logging is used, once the set of logs is produced, one can work with it according to the particular need. From my experience, efficient work with textual logs requires a tool with the following capabilities:
- Ability to search for a particular substring or regular expression.
- Ability to filter text lines according to the substring or regular expressions.
- Ability to highlight particular substrings.
- Ability to mark certain lines for separate examination (with extra notes if possible).
- Ability to save and restore the current state of work.
While all text editors should be able to provide requirement 1, requirements 2-5 are usually more tricky and text editors won’t support them out of the box. Fortunately, any modern extensible text editor should be able to support requirements 2-5 after some extra configuration.
Setting up Emacs to work with logs #
Throughout the following sections, I use Emacs, the classic “extensible, customizable, free/libre text editor”, to showcase how it can be set up and used to meet the above criteria and to make work with logs a gentle experience.
Emacs, just like any other text editor, provides the support for requirement 1 from the previous section out of the box.
loccur - the minor mode for text filtering #
To support requirement 2, it requires some extra mode. My recommendation for that is loccur - the minor mode
that acts just like a classic grep *nix utility yet directly in the editor. The benefit of that mode (over e.g. occur)
is that it works in-place. Therefore it’s very ergonomic and - as I’ll show later - it works well in conjunction with bookmarking mode.
Installation of loccur is very simple and can be done from within the built-in package manager:
M-x package-install RET loccur RET
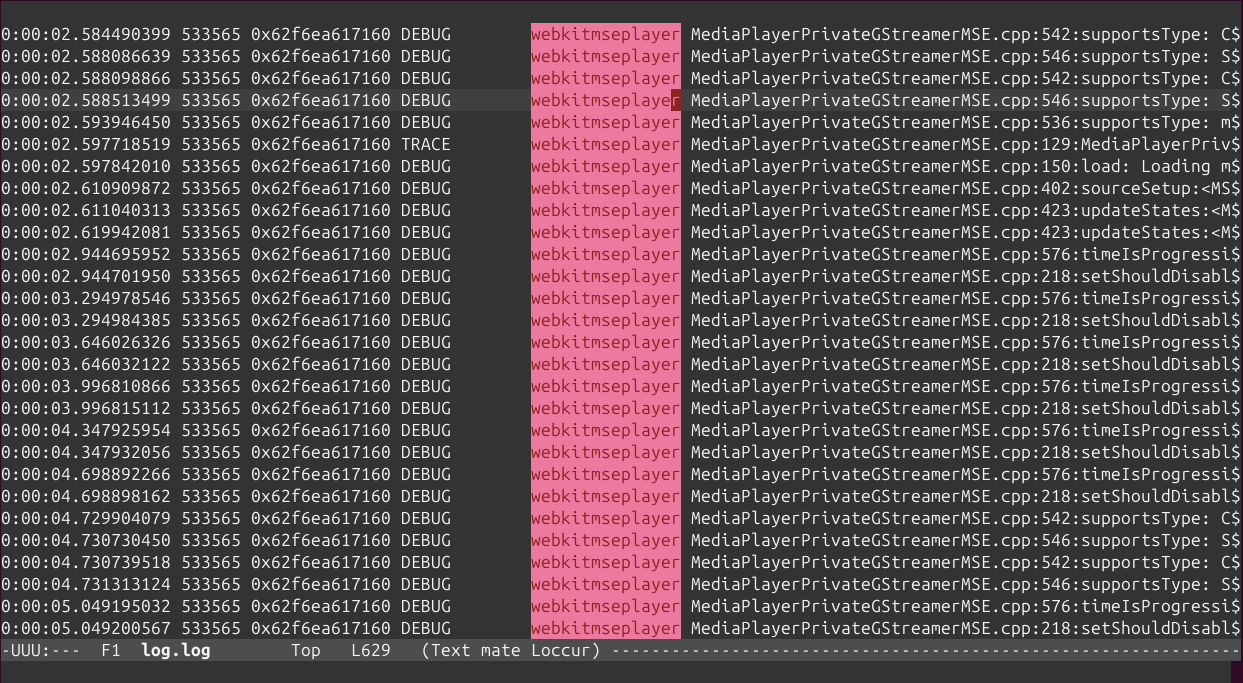
With loccur installed, one can immediately start using it by calling M-x loccur RET <regex> RET. The figure below depicts the example of filtering:
highlight-symbol - the package with utility functions for text highlighting #
To support requirement 3, Emacs also requires the installation of extra module. In that case my recommendation is highlight-symbol that is a simple set of functions that enables basic text fragment highlighting on the fly.
Installation of this module is also very simple and boils down to:
M-x package-install RET highlight-symbol RET
With the above, it’s very easy to get results like in the figure below:

C-c h to toggle the highlight of the text at the current cursor position.
bm - the package with utility functions for buffer lines bookmarking #
Finally, to support requirements 4 and 5, Emacs requires one last extra package. This time my recommendation is bm that is quite a powerful set of utilities for text bookmarking.
In this case, installation is also very simple and is all about:
M-x package-install RET bm RET
In a nutshell, the bm package brings some visual capabilities like in the figure below:

The final configuration #
Once all the necessary modules are installed, it’s worth to spend some time on configuration. With just a few simple tweaks it’s possible to make the work with logs simple and easily reproducible.
To not influence other workflows, I recommend attaching as much configuration as possible to any major mode and setting that mode as a default for
files with certain extensions. The configuration below uses a major mode called text-mode as the one for working with logs and associates all the files with a
suffix .log with it. Moreover, the most critical commands of the modes installed in the previous sections are binded to the key shortcuts. The one last
thing is to enable truncating the lines ((set-default 'truncate-lines t)) and highlighting the line that the cursor is currently at ((hl-line-mode 1)).
(add-to-list 'auto-mode-alist '("\\.log\\'" . text-mode))
(add-hook 'text-mode-hook
          (lambda ()
            (define-key text-mode-map (kbd "C-c t") 'bm-toggle)
            (define-key text-mode-map (kbd "C-c n") 'bm-next)
            (define-key text-mode-map (kbd "C-c p") 'bm-previous)
            (define-key text-mode-map (kbd "C-c h") 'highlight-symbol)
            (define-key text-mode-map (kbd "C-c C-c") 'highlight-symbol-next)
            (set-default 'truncate-lines t)
            (hl-line-mode 1)
            ))
WebKit logs case study #
To show what the workflow of Emacs is with the above configuration and modules, some logs are required first. It’s very easy to get some logs out of WebKit, so I’ll additionally get some GStreamer logs as well. For that, I’ll build a WebKit GTK port from the latest revision of WebKit repository. To make the build process easier, I’ll use the WebKit container SDK.
Here’s the build command:
./Tools/Scripts/build-webkit --gtk --debug --cmakeargs="-DENABLE_JOURNALD_LOG=OFF"The above command disables the ENABLE_JOURNALD_LOG build option so that logs are printed to stderr. This will result in the WebKit and GStreamer logs being bundled together as intended.
Once the build is ready, one can run any URL to get the logs. I’ve chosen a YouTube conformance tests suite from 2021 and selected test case “39. PlaybackRateChange” to get some interesting entries from multimedia-related subsystems:
export GST_DEBUG_NO_COLOR=1
export GST_DEBUG=4,webkit*:7
export WEBKIT_DEBUG=Layout,Media=debug,Events=debug
export URL='https://ytlr-cert.appspot.com/2021/main.html'
./Tools/Scripts/run-minibrowser --gtk --debug --features=+LogsPageMessagesToSystemConsole "${URL}" &> log.log
The commands above reveal some interesting aspects of how to get certain logs. First of all, the commands above specify a few environment variables:
GST_DEBUG=4,webkit*:7- to enable GStreamer logs of levelINFO(for all categories) and of levelTRACEfor thewebkit*categoriesGST_DEBUG_NO_COLOR=1- to disable coloring of GStreamer logsWEBKIT_DEBUG=Layout,Media=debug,Events=debug- to enable WebKit logs for a few interesting channels.
Moreover, the runtime preference LogsPageMessagesToSystemConsole is enabled to log console output logged by JavaScript code.
The workflow #
Once the logs are collected, one can open them using Emacs and start making sense out of them by gradually exploring the flow of execution. In the below exercise, I intend to understand what happened from the multimedia perspective during the execution of the test case “39. PlaybackRateChange”.
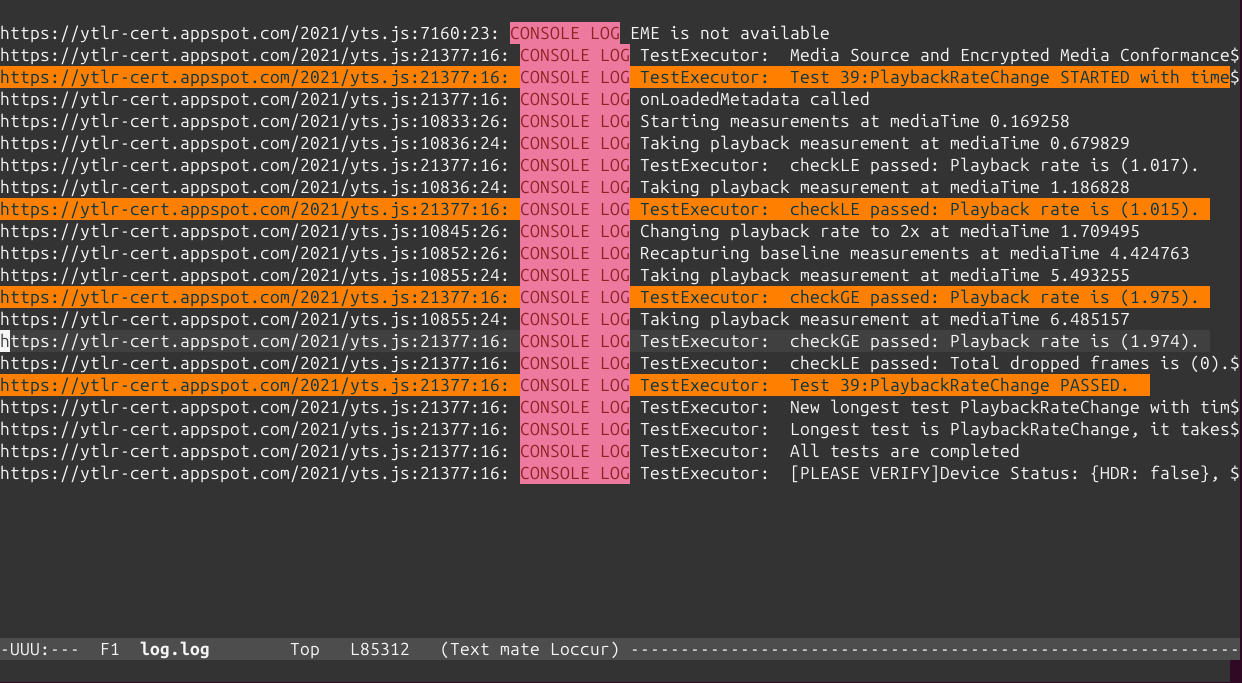
The first step is usually to find the most critical lines that mark more/less the area in the file where the interesting things happen. In that case I propose using M-x loccur RET CONSOLE LOG RET to check what the
console logs printed by the application itself are. Once some lines are filtered, one can use bm-toggle command (C-c t) to mark some lines for later examination (highlighted as orange):
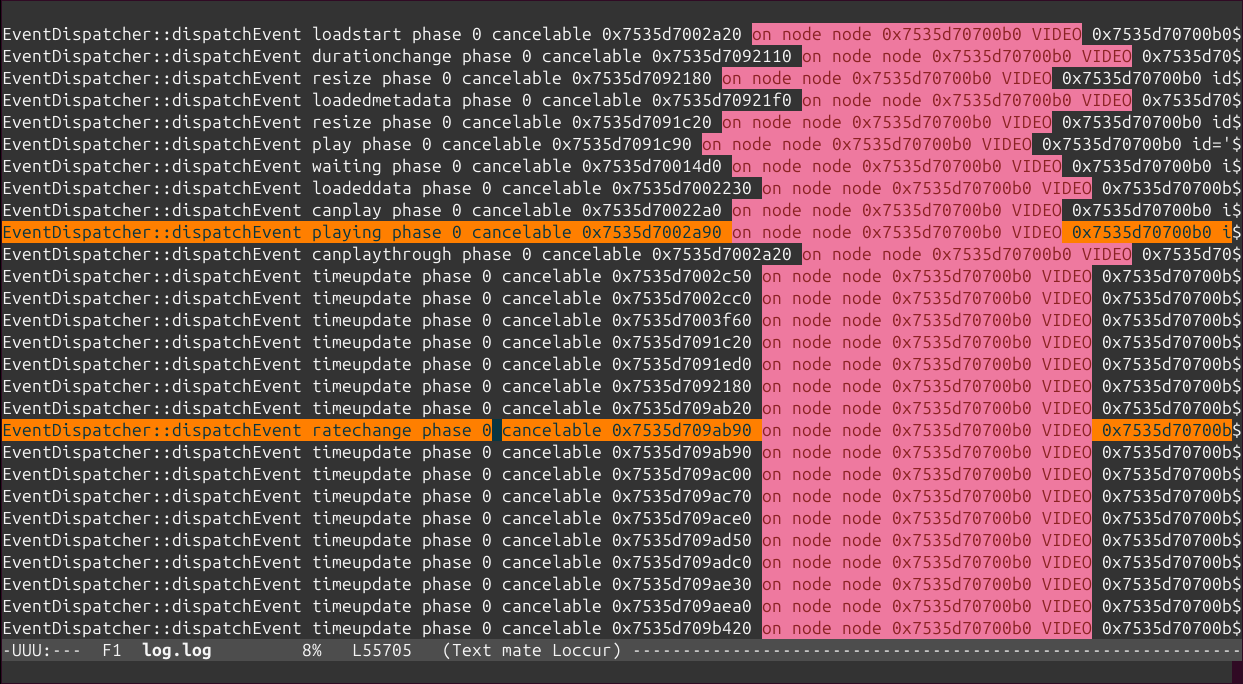
For practicing purposes I propose exiting the filtered view M-x loccur RET and trying again to see what events the browser was dispatching e.g. using M-x loccur RET on node node 0x7535d70700b0 VIDEO RET:
In general, the combination of loccur and substring/regexp searches should be very convenient to quickly explore various types of logs along with marking them for later. In case of very important log
lines, one can additionally use bm-bookmark-annotate command to add extra notes for later.
Once some interesting log lines are marked, the most basic thing to do is to jump between them using bm-previous (C-c n) and bm-next (C-c p). However, the true power of bm mode comes with
the use of M-x bm-show RET to get the view containing only the lines marked with bm-toggle (originally highlighted orange):
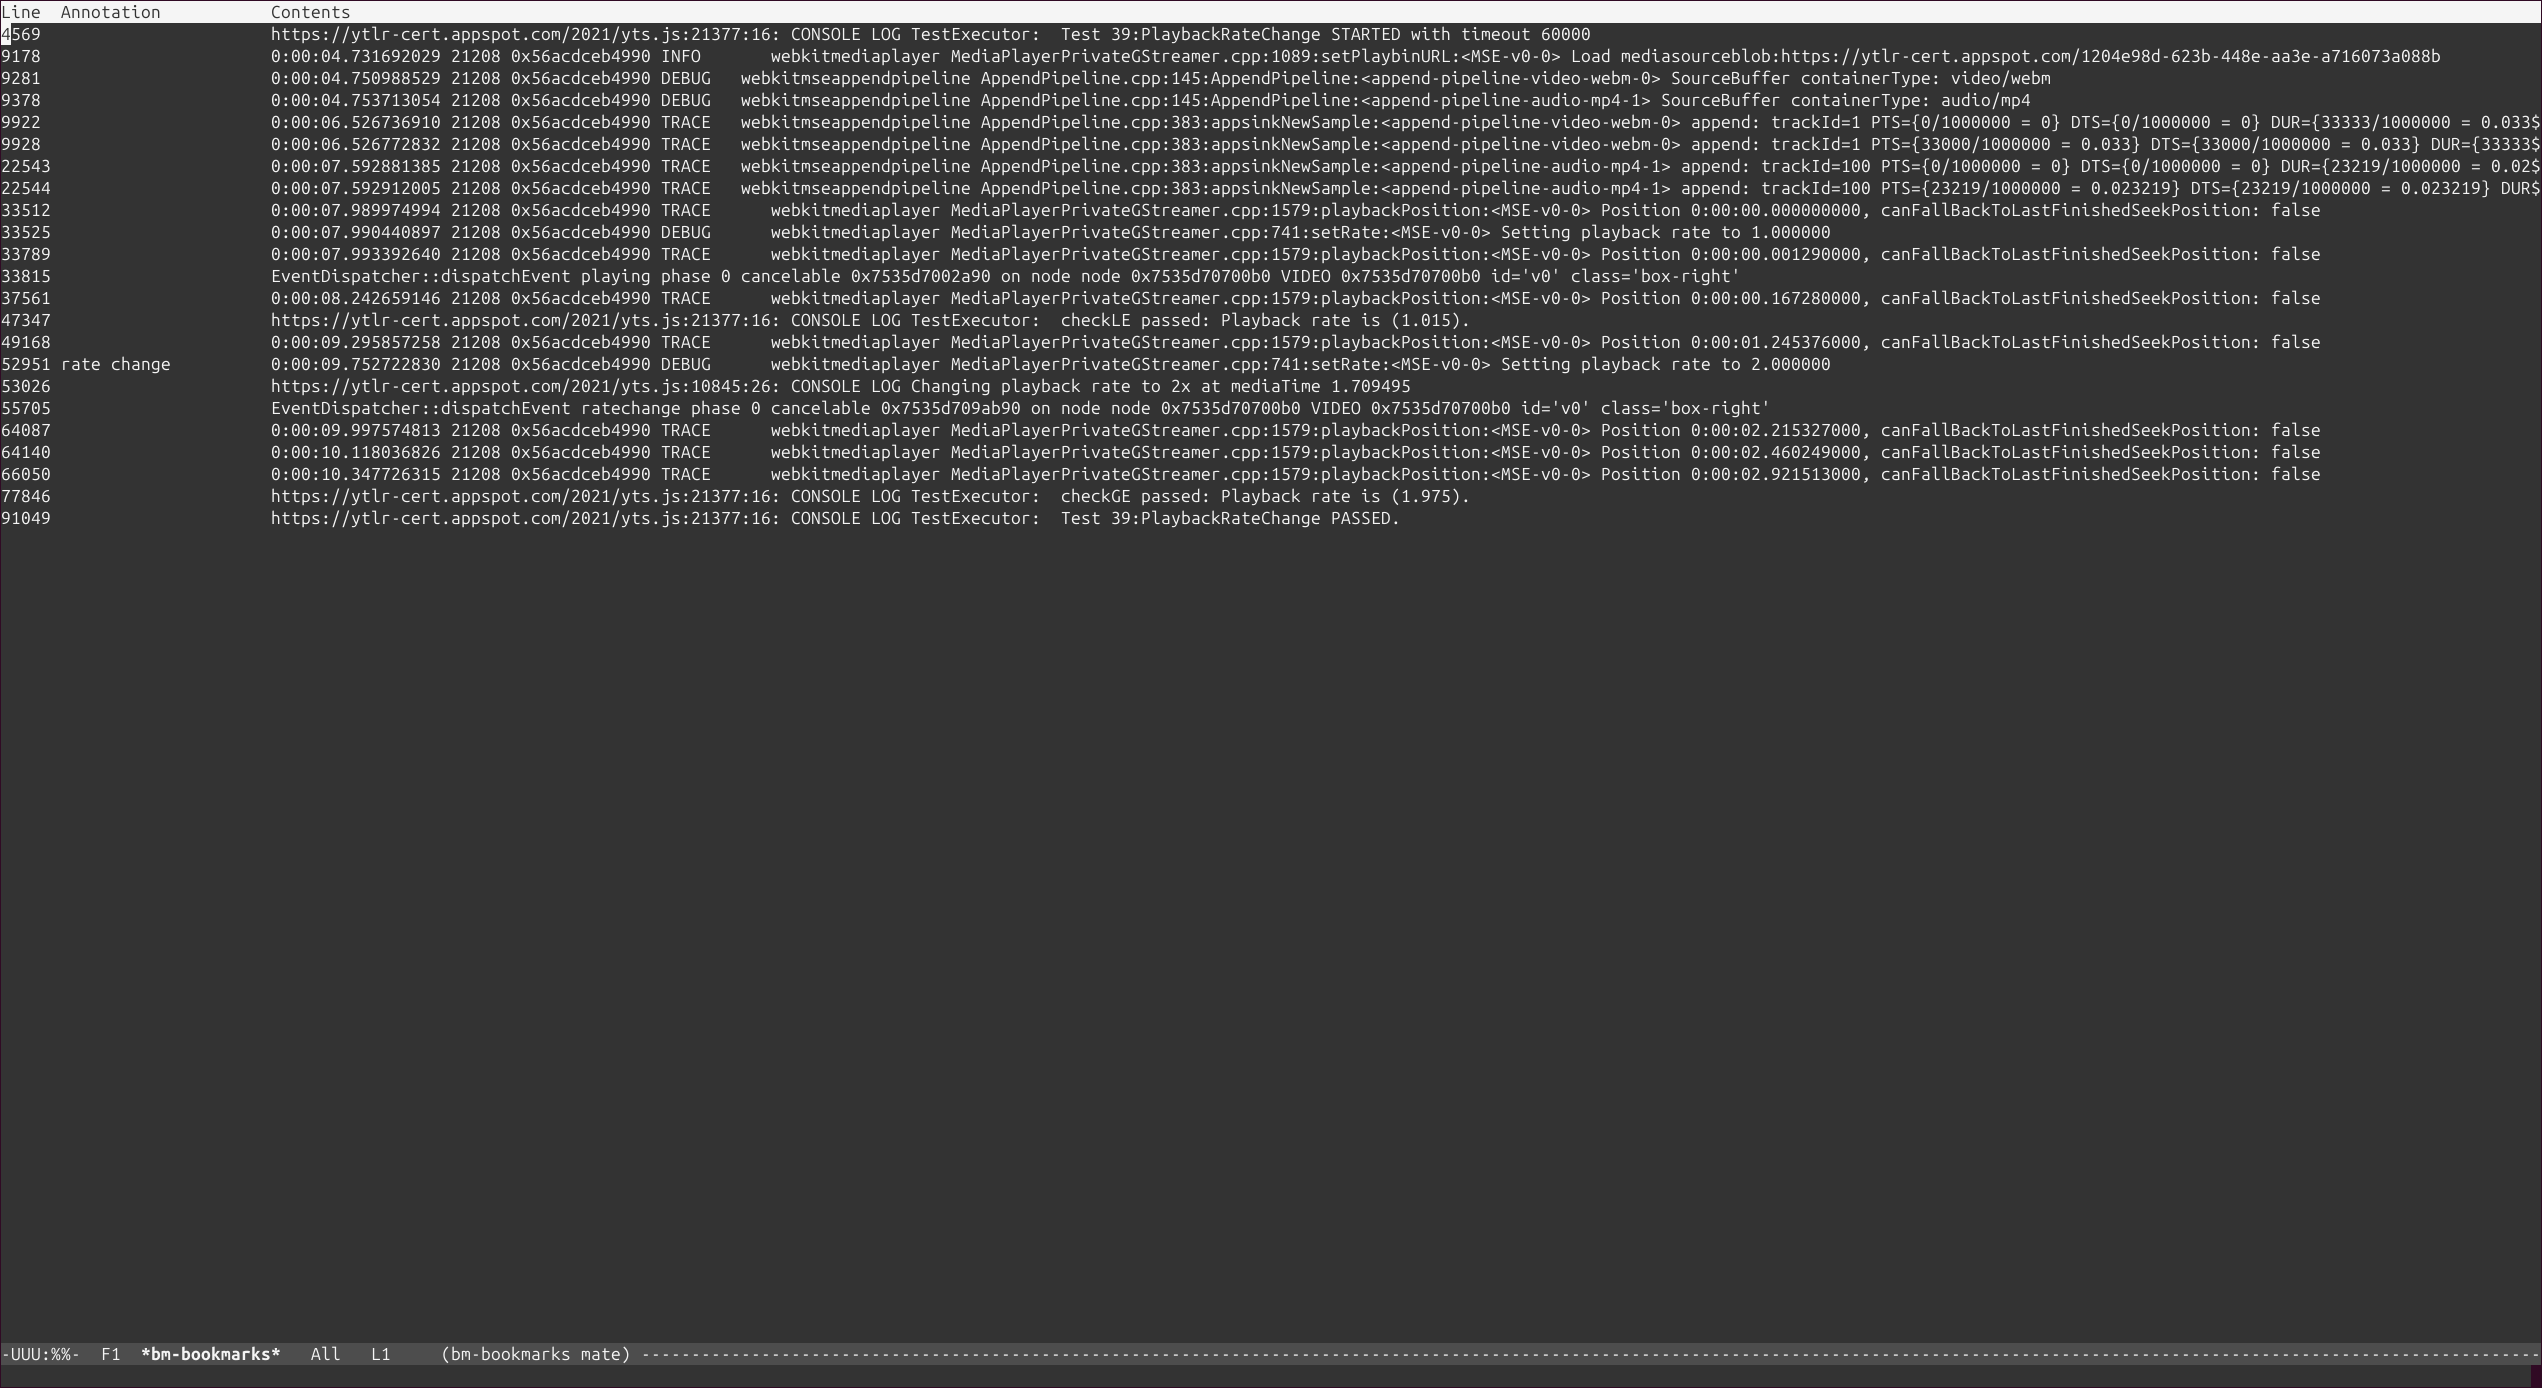
This view is especially useful as it shows only the lines deliberately marked using bm-toggle and allows one to quickly jump to them in the original file. Moreover, the lines are displayed in
the order they appear in the original file. Therefore it’s very easy to see the unified flow of the system and start making sense out of the data presented. What’s even more interesting,
the view contains also the line numbers from the original file as well as manually added annotations if any. The line numbers are especially useful as they may be used for resuming the work
after ending the Emacs session - which I’ll describe further in this section.
When the *bm-bookmarks* view is rendered, the only problem left is that the lines are hard to read as they are displayed using a single color. To overcome that problem one can use the macros from
the highlight-symbol package using the C-c h shortcut defined in the configuration. The result of highlighting some strings is depicted in the figure below:
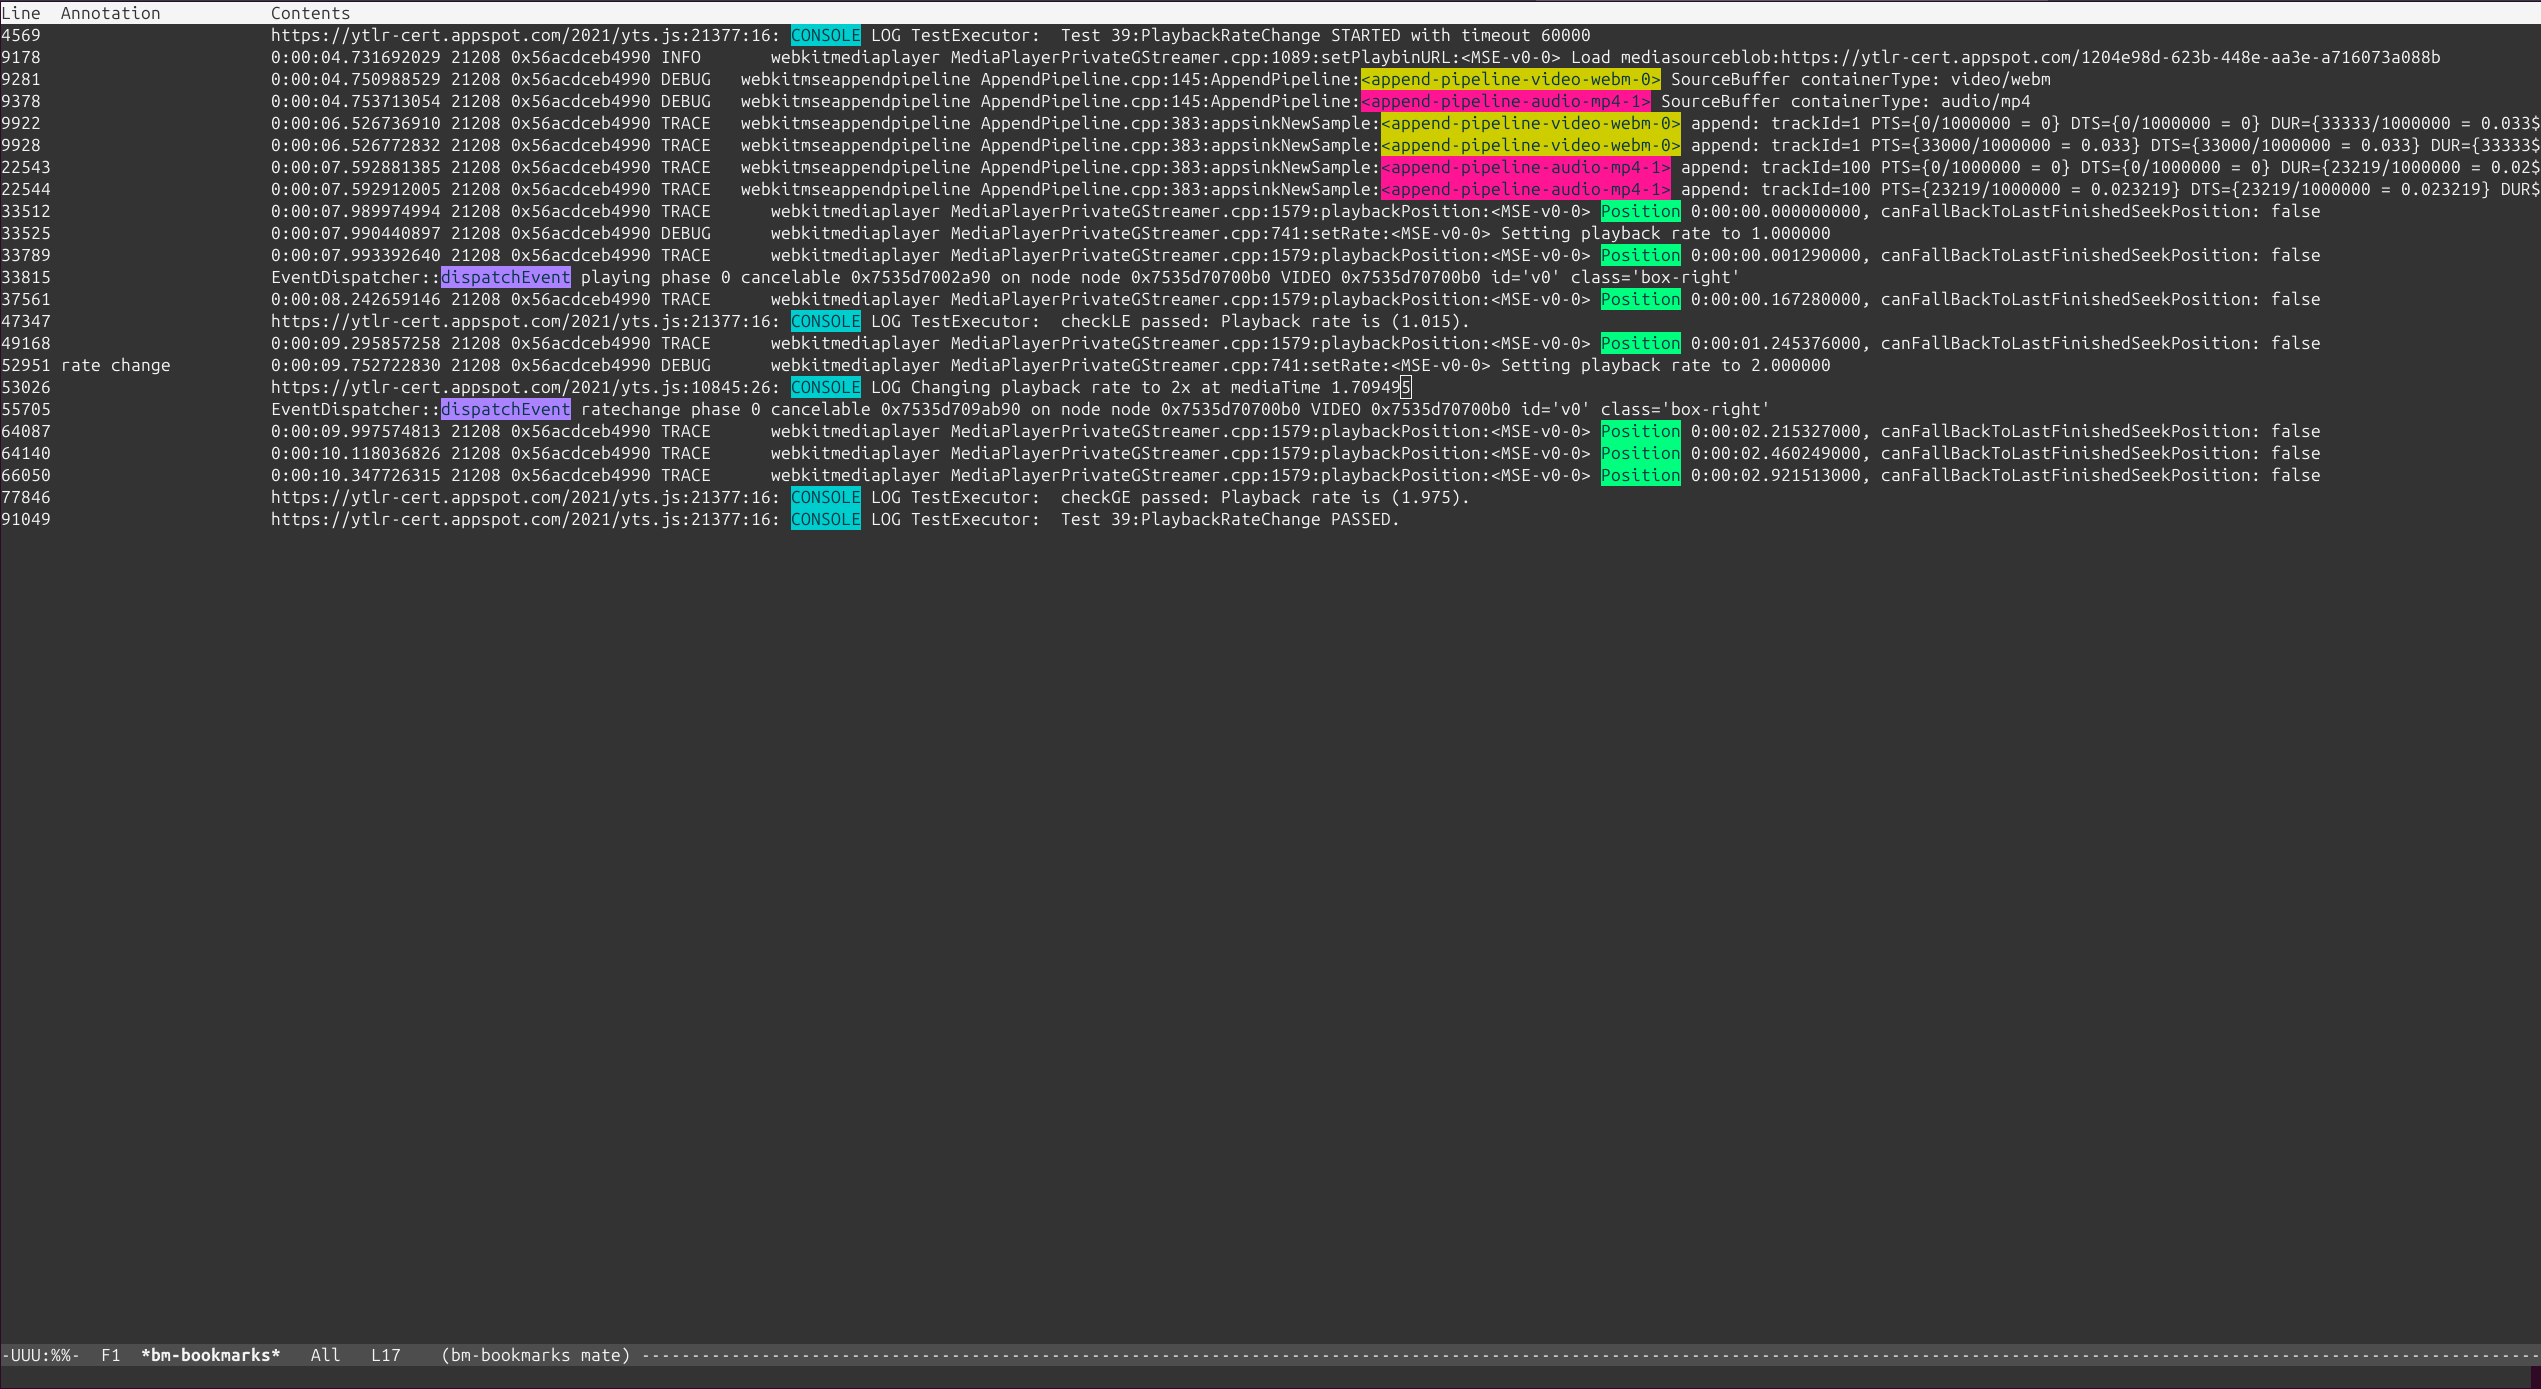
With some colors added, it’s much easier to read the logs and focus on essential parts.
Saving and resuming the session #
On some rare occasions it may happen that it’s necessary to close the Emacs session yet the work with certain log file is not done and needs to be resumed later. For that, the simple trick is to open the current
set of bookmarks with M-x bm-show RET and then save that buffer to the file. Personally, I just create a file with the same name as log file yet with .bm prefix - so for log.log it’s log.log.bm.
Once the session is resumed, it is enough to open both log.log and log.log.bm files side by side and create a simple ad-hoc macro to use line numbers from log.log.bm to mark them again in the log.log
file:
As shown in the above gif, within a few seconds all the marks are applied in the buffer with log.log file and the work can resume from that point i.e. one can jump around using bm, add new marks etc.
Summary #
Although the above approach may not be ideal for everybody, I find it fairly ergonomic, smooth, and covering all the requirements I identified earlier. I’m certain that editors other than Emacs can be set up to allow the same or very similar flow, yet any particular configurations are left for the reader to explore.