Hot accessibility for LibreOffice 4.3.0

The first release candidates for LibreOffice 4.3.0 are already bouncing around the internet and, besides great new features like the ones I’ve been explaining in my latest posts, they come with a set of fixes to ease the life of screen reader users and developers alike. This is, once again, a part of the accessibility work we do at Igalia.

Back in April, when the Gran Canaria hackfest took place, I started working on the bug #71556. The problem was that typing on a document triggered a lot of unnecessary text-attributes-changed events. These events had a variety of origins, but most of them were caused by modifications in the internal text attribute rsid, used for change tracking and with no relevance per se for the user. The bug is not completely fixed, but addressing the problem with rsid attribute allowed us to get rid of the most annoying part of it; now LibreOffice only sends one unnecessary event when we type the first character in a new paragraph and not with every keystroke.

Bug #71558 is also related with the same kind of events; in this case, text-attributes-changed was not being triggered when a word became marked as misspelled. Actually, the spell-checking status is not internally treated as a text attribute and because of that there were no events indicating its change. The patch explicitly raises the event which lets the accessibility code check the status of the text attributes and find out the spelling mistake. While I was working on this issue, I also detected a weird behavior when checking the text attributes through the Python API; it resulted to be a bug in the bridge between AT-SPI and ATK, which I reported and fixed too.

A triaging session took me to bug #74681; the main issue reported there had already been fixed for a while and only small bits regarding missing accessible names in some buttons were missing. I fixed that allowing toolbar buttons to use their tooltip text as the accessible name if it is not explicitly set, and now the paragraph properties panel is fully accessible.

Finally, I retook the work I had been doing in relation with ATK roles at bug #39944 and detected wrong mappings for LibreOffice EDIT_BAR, EMBEDDED_OBJECT and HYPER_LINK accessible roles. I fixed them and opened a ticket in ATK bugzilla to create ATK roles for the five cases that were still registering custom roles. Once that ticket is managed, hopefully we will be able to close bug #75191 too, which is related with the deprecation of atk_role_register.

These fixes are added on top of the ones coded in February hackfest, making 4.3.0 the most accessible LibreOffice so far… Until the next version arrives, of course!

Tales of LibreOffice interoperability: shape effects

We continue introducing features that will be part of the 4.3.0 release of LibreOffice, which is coming soon. After having worked in the preservation of color in shapes, we worked on the different effects that can be applied to shapes and bitmaps.

There are three types of effects that are managed separately in the DrawingML specification.

General shape effects

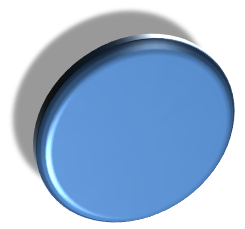
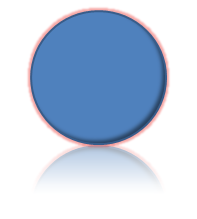
Examples of these effects are inner or outer shadows, reflections, glow… They can be applied both to vectorial shapes or bitmaps, and several of them can be applied at the same time.

Shape effects sample

These effects are indicated with the a:effectLst tag inside the shape properties tag spPr. I won’t explain their specification in detail because you can find a very good description in this website, but you can get an idea by taking a look at the following example where three effects are applied: glow, inner shadow and reflection:

[code language=”xml”]
<a:effectLst>
<a:glow rad="63500">
<a:schemeClr val="accent2">
<a:satMod val="175000" />
<a:alpha val="40000" />
</a:schemeClr>
</a:glow>
<a:innerShdw blurRad="63500" dist="50800"
dir="2700000">
<a:prstClr val="black">
<a:alpha val="50000" />
</a:prstClr>
</a:innerShdw>
<a:reflection blurRad="6350" stA="52000"
endA="300" endPos="35000" dir="5400000"
sy="-100000" algn="bl"
rotWithShape="0" />
</a:effectLst>
[/code]

Notice that some effects only have some attributes while others contain color specifications as child elements like the ones explained in the previous post.

3D effects

Shapes and bitmaps can be transformed into 3D objects and get lighting and camera modifications applied to them.

Shape 3D effects sample

These effects are basically controlled by two children tags of spPr. One of them is a:scene3d and controls the camera and lighting, and the other one is a:sp3d which controls the transformation of the shape in a 3D object adding extrusion, bevels and a material effect to the surface. In the same website I linked before, you can read a description of scene3d and sp3d tags and their children. Find an example of their combined use below:

[code language=”xml”]
<a:scene3d>
<a:camera prst="perspectiveRelaxedModerately"
zoom="150000">
<a:rot lat="19490639" lon="0"
rev="12900001" />
</a:camera>
<a:lightRig rig="threePt" dir="t">
<a:rot lat="0" lon="0" rev="4800000" />
</a:lightRig>
</a:scene3d>
<a:sp3d z="488950" extrusionH="63500"
prstMaterial="metal">
<a:bevelT w="165100" prst="coolSlant" />
<a:extrusionClr>
<a:schemeClr val="tx2" />
</a:extrusionClr>
</a:sp3d>
[/code]

Artistic effects

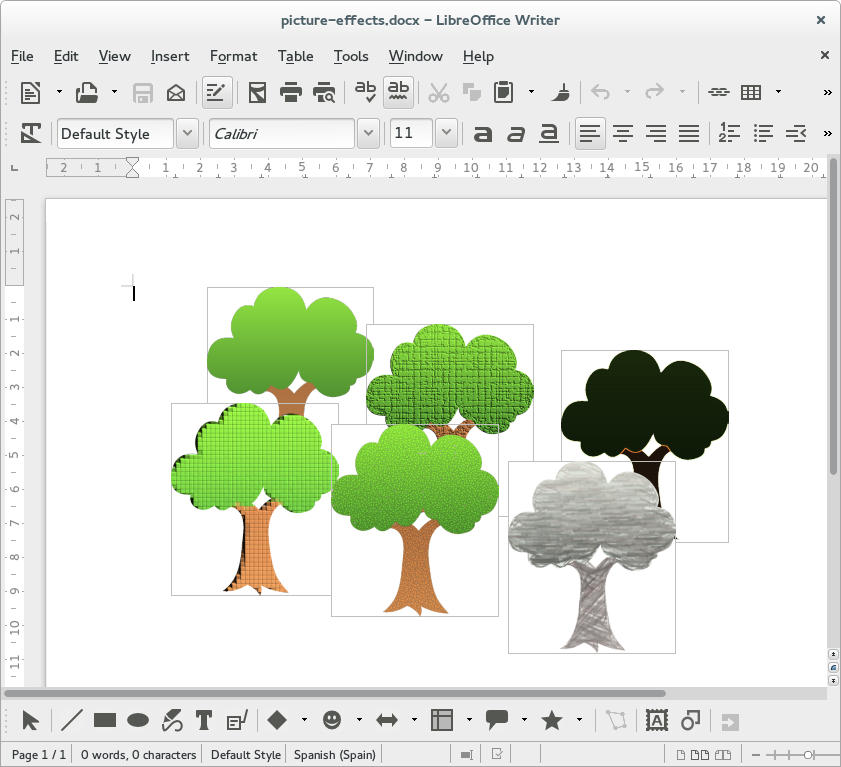
Effects from the last category act like the filters found in image manipulation programs (blur, grain or background removal among others) and that’s why they only can be applied to bitmaps. This is actually not a part of DrawingML spec but an extension over it.

There is an important difference with other filters; these ones come pre-calculated in the document. The bitmap linked by the DrawingML shape already comes with the effect, and the effect specification links a second bitmap that contains the original picture so the effect can be undone. This second bitmap is saved in the relatively new loss-less Windows Media Photo format.

Writer screenshot showing artistic effects

Check the following example of a blip-filled shape; the actual filling comes from the file linked as rId6, while the effect definition is linked to rId7 which is a copy of the original image before the filter was applied:

[code language=”xml”]
<a:blip r:embed="rId6" cstate="print">
<a:extLst>
<a:ext uri="{BEBA8EAE-BF5A-486C-A8C5-ECC9F3942E4B}">
<a14:imgProps xmlns:a14="http://schemas.microsoft.com/office/drawing/2010/main">
<a14:imgLayer r:embed="rId7">
<a14:imgEffect>
<a14:artisticLightScreen trans="10000" gridSize="6" />
</a14:imgEffect>
</a14:imgLayer>
</a14:imgProps>
</a:ext>
</a:extLst>
</a:blip>
[/code]

These are the relations between the ids and the files contained in the document, as specified at document.xml.rels:

[code language=”xml”]
<Relationship Id="rId6"
Type="http://schemas.openxmlformats.org/officeDocument/2006/relationships/image"
Target="media/image2.png" />
<Relationship Id="rId7"
Type="http://schemas.microsoft.com/office/2007/relationships/hdphoto"
Target="media/hdphoto1.wdp" />
[/code]

The funny thing of this approach is that LO was able to render these effects with no effort, although the program was not aware of the effect parameters or the original bitmap and these were being lost on save.

Preservation

We use again the grab bag technique to save all the tags and attributes related with the effects as a hidden property that will be used later in the export phase to re-build the effect definitions. In the case of artistic effects, we additionally need to make sure that the original bitmap is preserved; LibreOffice doesn’t support the Windows Media Photo format yet, but we can keep the raw stream of data and output it to a properly named file in the exported document. A small cache table is maintained by the exporter code to prevent that the same original file is saved more than once when two or more pictures apply effects to the same image.

We have finished with the improvements related to shapes and pictures, but there are a few interoperability features not yet mentioned which will be covered in a future post. Like the current and previous ones, they were developed by Igalia and sponsored by CloudOn.

Happy hacking!

Tales of LibreOffice interoperability: shape theme colors and styles

This is the latest chapter of the series about interoperability features that will be part of LibreOffice 4.3, brought to you by Igalia and sponsored by CloudOn, like the previous ones.

Last week we explained our work with theme color preservation for fonts and paragraphs, and now we move to a very close topic: the preservation of theme colors and styles on shapes.

XML definitions

DrawingML includes new conventions to denominate colors, wider than the initial OOXML spec as used for paragraphs and fonts. Such color definitions can be used in the context of shape properties or style definitions to define fillings, line colors, gradients…

In first place, English color names (red, black, etc.) can be used besides RGB values and theme color names; and for any color, a set of transformations can be defined, similarly to the tint and shade properties in fonts and paragraph colors, but with more options. An important transformation is alpha to define the transparency of that color.

Find below one example of each color tag (for color names, RGB values or theme colors), with or without transformations:
[code language=”xml”]
<!– color by name, with an alpha transform –>
<a:prstClr val="black">
<a:alpha val="50000"/>
</a:prstClr>

<!– color by RGB value, no transforms –>
<a:srgbClr val="FF0000"/>

<!– theme color, with two transforms –>
<a:schemeClr val="accent1">
<a:satMod val="175000"/>
<a:alpha val="40000"/>
</a:schemeClr>
[/code]

Shapes in DrawingML receive their attributes from two different sources: the style definitions and the own shape properties. The former act as a fallback of the latter; attributes from style definitions will only be applied if they are not overwritten by shape properties. For example, in case a shape contains both a filling definition among its properties and a filling style, the filling definition prevails.

The theme file defines a list of filling and line styles so they can be used by shapes. This is an example of an area filling style which adds a couple of color transformations:

[code language=”xml”]
<a:fillStyleLst>
<a:solidFill>
<a:schemeClr val="phClr">
<a:tint val="15000"/>
<a:satMod val="350000"/>
</a:schemeClr>
</a:solidFill>
<!– more fill style definitions –>
</a:fillStyleLst>
[/code]

Notice it’s not using any particular color, phClr is an entry parameter of sorts for a color that will be indicated in the shape style definition. The style definition can add some transformations or even define a gradient fill based on that color.

A line style definition can be a bit more complex, because it has more format options: width, dash pattern, single or double… These options are available for shape properties too.

[code language=”xml”]
<a:lnStyleLst>
<a:ln w="9525" cap="flat" cmpd="sng" algn="ctr">
<a:solidFill>
<a:schemeClr val="phClr"/>
</a:solidFill>
<a:prstDash val="solid"/>
</a:ln>
<!– more line style definitions –>
</a:lnStyleLst>
[/code]

This is how a shape from the document would be assigned to the first filling style and the second line style, specifying “accent1” and “accent2″ colors as parameters:

[code language=”xml”]
<wps:style>
<a:lnRef idx="2"> <!– use the second element from fillStyleLst –>
<a:schemeClr val="accent1"/>
</a:lnRef>
<a:fillRef idx="1"> <!– use the first element from lnStyleLst –>
<a:schemeClr val="accent2"/>
</a:fillRef>

</wps:style>
[/code]

Finally, this is how a shape can overwrite the style-defined attributes for its filling and line. The following XML chunk defines a solid filling for the area using “accent3” color and a solid color for the shape line using “accent4″:
[code language=”xml”]
<wps:spPr> <!– shape properties tag –>

<a:solidFill> <!– area filling –>
<a:schemeClr val="accent3"/>
</a:solidFill>
<a:ln> <!– line properties –>
<a:solidFill>
<a:schemeClr val="accent4"/>
</a:solidFill>
</a:ln>

</wps:spPr>
[/code]

The importer code

The duty of the importer code is, in general, applying the style definitions, merging them with the shape properties and transforming the properties in a way that matches LibreOffice internal data model.

Applying the style definitions means getting the corresponding styles from the theme file and applying them to the specific colors indicated in the shape wps:style block. This results in a set of properties that has to be merged with the shape-specific ones, and this is done so the latter have priority, as explained before.

All properties must be transformed to match LibreOffice data model, and specially colors because of their complexity. Theme colors are translated to their RGB value checking the theme definition to match the color name with its value. As for color transformations, the importer applies all the transformations to the original color to get a final RGB value. The only exception is the alpha transformation, which is converted in a transparency value to be stored in the fill properties object (alpha and transparency are complementary; after homogenizing their units, alpha = 1 – transparency).

LibreOffice doesn’t have equivalent concepts to theme colors and color transformations other than alpha, and doesn’t have shape styles either. To prevent information loss, we will use a hidden property in the Shape object called the interop grab bag to fill it with any properties we need to rebuild this information on export:

  • To preserve a theme color, we need to store its name and the complete list of transformations. We will also need the RGB value of the color with all the transformations applied, so we can compare it with the final color to know if the user has changed it. We do it both for line and filling colors.
  • For preset and RGB colors, the loss of the transformations is not important so we don’t consider this special case.
  • To preserve the style definitions, we store the idx attribute of each and their color parameter, with all transformations if necessary. We also store the RGB value of the color including transformations because we will need it too.

The exporter code

The normal behavior of the exporter is translating every LibreOffice shape property to DrawingML to write it to the document. In the case of colors, that means using a a:srgbClr tag to save it in RGB format and optionally adding an alpha transformation calculated from the shape transparency value.

The preservation of shape styles, area and line colors increases a bit the complexity. The shape grab bag must be checked for interoperability information saved in the import phase which should be saved back to the document under certain circumstances.

If there are any style definitions in the shape grab bag, they are always written back to the document; we need no additional verification because style definitions act as a fallback as we already explained. On the other hand, the case of shape properties has some complexity because we must perform several checks before deciding which area and line information we want to save:

  • Does the final color match the original one? If it doesn’t, it means the user has changed it during edition, so the new one must be saved and the information in the grab bag discarded.
  • If the original and final colors match, is there any theme color information in the grab bag? If there is, we must write it to the shape properties.
  • If the original and final colors match and there is no theme color information in the grab bag, we must compare the color with the style color; if they match, it means the shape was using the style color so we must not write a shape property that would overwrite it.
  • Otherwise, the shape was using a custom color different from the style color and must be written to the shape properties.

Bonus track: multiple color gradients

While I was working on this topic, I noticed that DrawingML allows to specify gradient fillings with any number of steps, unlike in previous MS Office documents (and LibreOffice ones) where you could only use two. This is an example of gradient with three steps:

[code language=”xml”]
<wps:spPr>

<a:gradFill>
<a:gsLst>
<a:gs pos="0">
<a:srgbClr val="ffff00" />
</a:gs>
<a:gs pos="50000">
<a:srgbClr val="ffff33">
<a:alpha val="20000" />
</a:srgbClr>
</a:gs>
<a:gs pos="100000">
<a:srgbClr val="ff0000" />
</a:gs>
</a:gsLst>
<a:lin ang="5400000" />
</a:gradFill>

</wps:spPr>
[/code]

Every a:gs tag indicates a point in the gradient extension with the pos attribute, measured as a percentage, and the color of that point. The system should calculate the gradient between the colors of two consecutive points.

LibreOffice does an approximation of those gradients with more than two steps using only two colors when it imports the document. To prevent information loss, we use again the grab bag to store the complete gradient definition. In an analogous way, we store the original, approximated gradient information to be able to compare it with the gradient information in the moment of the save operation.

We can identify three situations in the exporter:

  • The original and final gradients don’t match: it means the user has changed it during edition, so the new one must be saved and the information in the grab bag discarded.
  • The original and final gradients match and there is a full gradient definition stored in the grab bag: we must write that gradient definition to the shape properties.
  • The original and final gradients match and there isn’t any gradient definition stored in the grab bag: the gradient definition comes from the shape style and in that case we must not write the shape property that would, again, overwrite it.

One more thing or two

As you can see, this feature relies on the hidden interop grab bag property which contains more and more information as we increase its use to preserve unsupported properties. We hope to reduce its weight as those properties become natively supported. I would also like to comment that we have complemented our work with a set of unit tests that will help to detect regressions appearing in the future.

We haven’t yet finished with shapes; next post will be related to the preservation of different kinds of shape effects. It will be ready soon!

Tales of LibreOffice interoperability: font and paragraph colors

Last week, LibreOffice community branched out the version 4.3 in preparation of the next release in July. We had already introduced one of the new interoperability features that will be part of that release in the previous post in this series, and now we will continue explaining how OOXML theme colors will be preserved in LibreOffice.

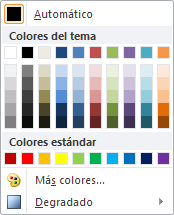
Theme colors have a prominent place in the color palette in the latest Microsoft Office versions, as you can see:
Word color elector

They consist on a palette of ten colors, each one of them with five more variations. When a user changes the document theme, a new palette of colors will be loaded and any objects in the document that used one of those colors will be updated with the corresponding one from the new palette.

In the XML document, a theme color is identified by a name, and its variations are implemented with two attributes: shade to lighten the color and tint to darken it.

This is an example of theme color applied to the characters in a text run – a chunk of text with the same properties. In the run properties (rPr) we find the following tag (reference):
[code language=”xml”]
<w:rPr>
<w:color w:val="E5B8B7" w:themeColor="accent2" w:themeTint="66"/>
</w:rPr>
[/code]
Theme color for character

This is the theme color named accent2 darkened a 66%. The w:val property indicates the RGB code of the final color, it’s ignored if w:themeColor is present.

The preservation of this tag is simple:

  • On import, store w:themeColor, w:themeTint and w:themeShade properties as hidden properties in the text run.
  • Store the original color too!
  • On export, check if the original color has changed:
    • if it did, write only the new color in the w:val property.
    • if it didn’t, write the stored w:themeColor, w:themeTint and w:themeShade properties.

Now, an example of paragraph shade with theme colors (reference):
[code language=”xml”]
<w:pPr>
<w:shd w:val="thinDiagStripe"
w:color="215868" w:themeColor="accent5" w:themeShade="80"
w:fill="DBE5F1" w:themeFill="accent1" w:themeFillTint="33" />
</w:pPr>
[/code]
Paragraph filling with pattern

Paragraph shades can specify two colors, one for the background and another one for the pattern if present, with the type of pattern specified by the w:val attribute. The set of attributes w:color, w:themeColor, w:themeShade and w:themeTint work like in the case of font colors, specifying the RGB code, theme color name, shade and tint modifiers for the pattern; w:fill, w:themeFill w:themeFillTint and w:themeFillShade do the same for the background color.

The preservation of these properties works analogously; they are also stored as a hidden property of the text on import, and saved back on export in case the user hasn’t changed the fill color while editing the document with LibreOffice.

The w:shd tag can also be used in table or table cell properties with the same meaning. And speaking of tables, we also made sure that the table style property was preserved:

[code language=”xml”]
<w:tblPr>
<w:tblStyle w:val="Tablaconcuadrcula" />

</w:tblPr>
[/code]

We will continue next week with more shiny features brought to you by Igalia and CloudOn. Stay tuned!

Document Freedom Day 2014 recap

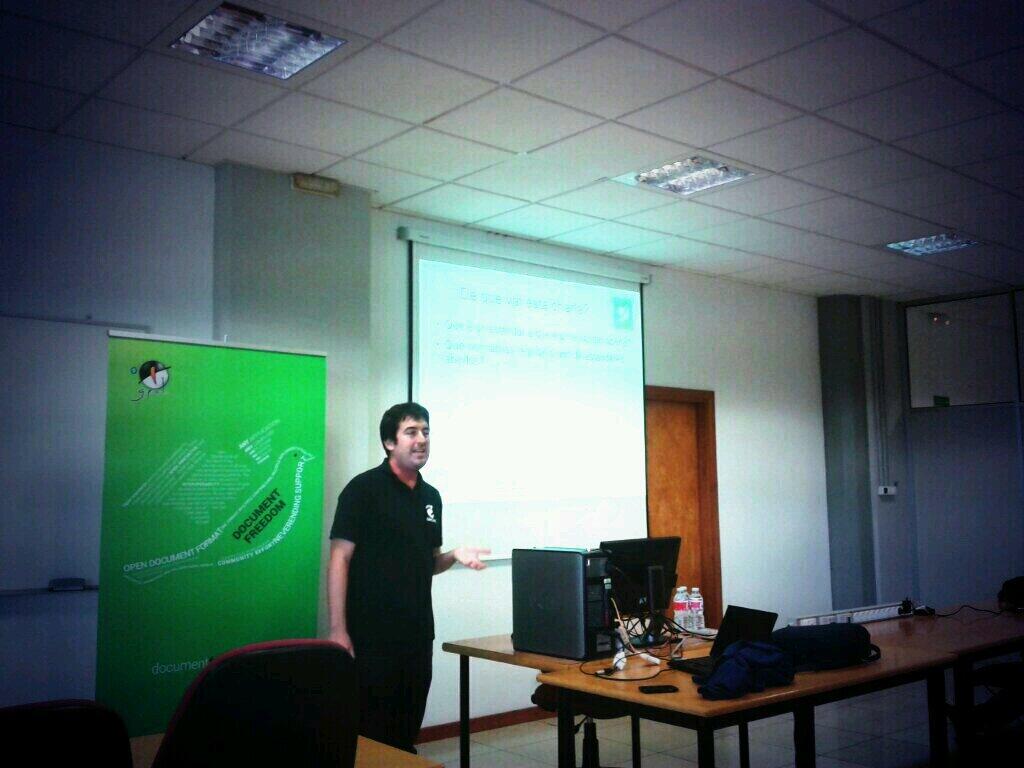
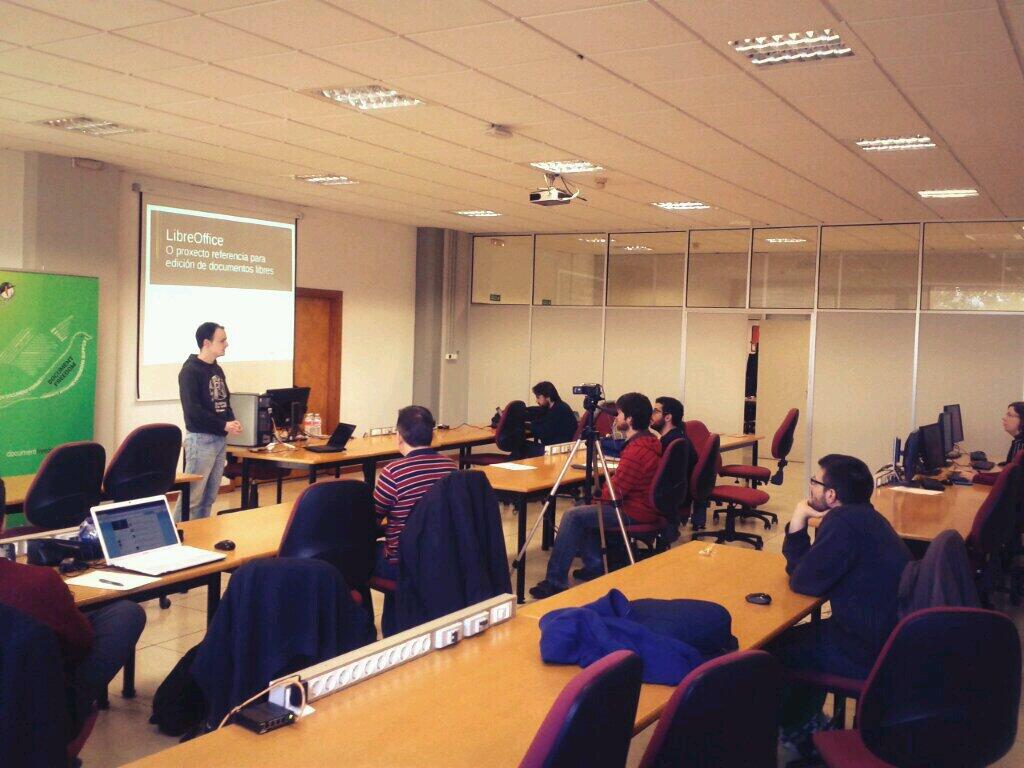
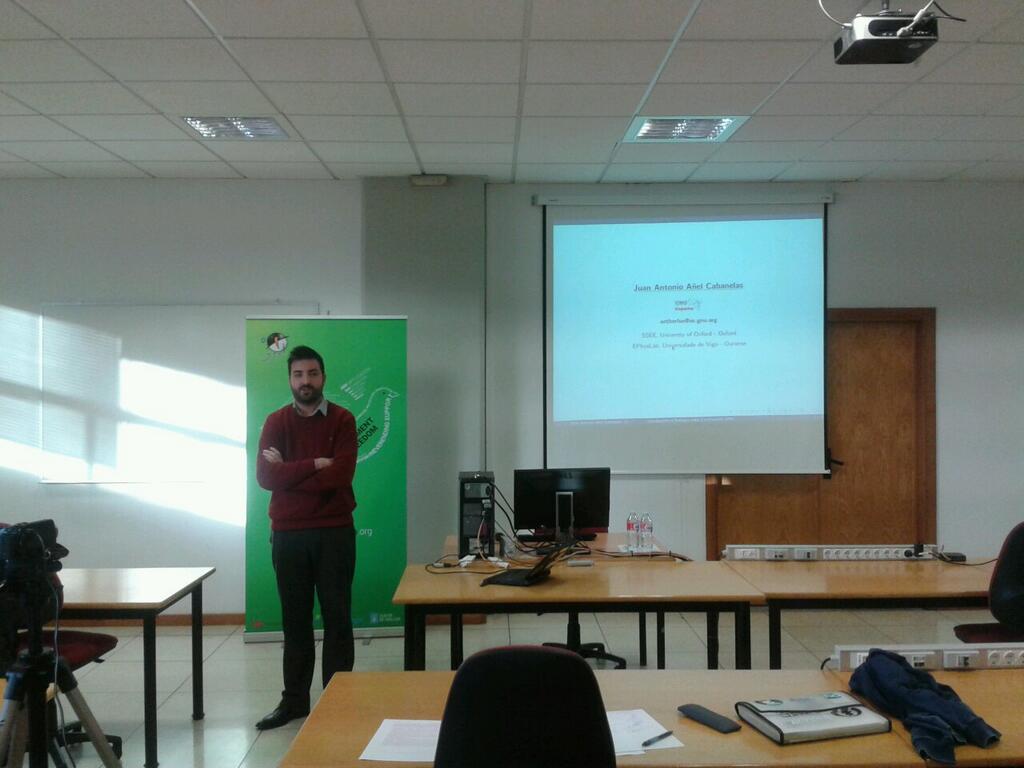
You already know I took part in the celebration of the Document Freedom Day speaking in an event in the University of Coruña. The nice people from GPUL had recorded the talks and now they are ready for everyone to enjoy, distribute or reuse under the terms of the Attribution-ShareAlike 4.0 International license.

Here are the talks:

Estándares abertos, a situación dende o punto de legal

Estándares abertos, a situación dende o punto de legal

LibreOffice, o proxecto de referencia para a edición de documentos libres

LibreOffice, o proxecto de referencia para a edición de documentos libres

Sobre a importancia dos estándares e formatos libres

Sobre a importancia dos estándares e formatos libres